
 Buy with Prime


There's something incredibly satisfying about creating a high-performance face cream with your own hands, perfectly tuned to what your skin needs, right in your own kitchen. This guide is here to pull back the curtain on cosmetic science, making it a fun and accessible craft. When you follow a solid handmade face cream recipe, you get to choose every single ingredient. That means no more guessing—just pure, intentional skincare that aligns with your goals.
The Joy of Bespoke Skincare
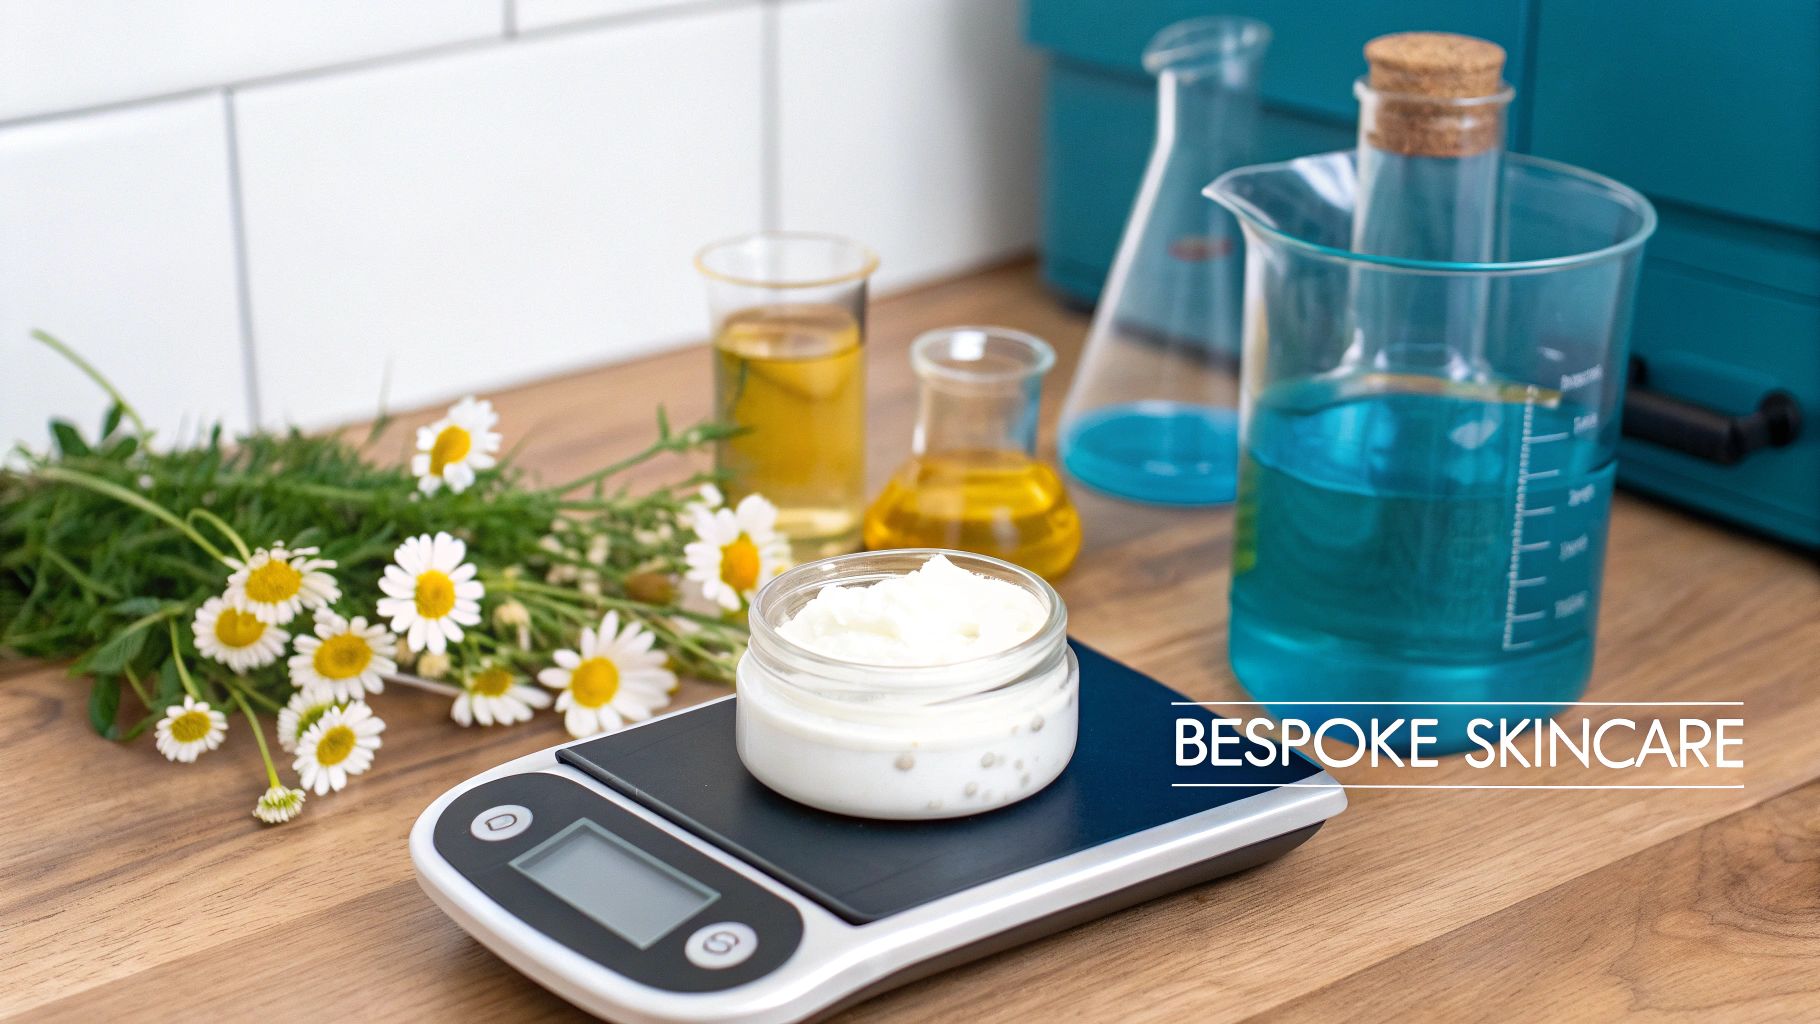
Diving into DIY skincare is about so much more than just mixing things in a beaker. It’s an act of empowerment. You get to call all the shots, ditching the one-size-fits-all products for a truly personalized approach that celebrates your unique complexion.
Making your own face cream from scratch means you can load it up with high-quality ingredients that support your specific aesthetic goals. This guide will walk you through the essential building blocks, turning what might seem intimidating into a straightforward, enjoyable project.
Understanding the Core Components
Every great cream you've ever used is an emulsion—a beautiful blend of oil and water, two things that famously don't get along. To get them to create that creamy, stable texture we all love, we need a few key players. Getting to know their roles is the first step to becoming a confident formulator.
Here’s a quick rundown of the building blocks we’ll be working with:
- Emollients: These are your oils and butters, the ingredients that give the cream its luxurious feel and leave your skin feeling soft and smooth. Think rich shea butter or silky, lightweight jojoba oil.
- Humectants: These are moisture magnets. Ingredients like glycerin and hyaluronic acid are superstars at drawing hydration to the skin, giving it that plump, dewy look.
- Emulsifiers: This is where the magic happens. Emulsifiers are the bridge that connects the oil and water, binding them together into a stable, cohesive cream.
- Actives: These are the powerhouses of your formula. They're the targeted ingredients—like peptides or plant extracts—that you add to address specific goals, whether that's promoting a firmer appearance or a brighter-looking complexion.
If you love the idea of creating your own custom products, you might also find some great inspiration from other heartfelt homemade gift ideas.
Beyond the Jar
The rewards go way beyond just the finished product. When you make your own skincare, you connect with your self-care routine on a much deeper level. You’ll learn about the unique properties of different botanicals and active ingredients, which makes you a smarter consumer all around. This knowledge puts you in the driver's seat.
By learning not just what to use but why, you transform your approach to skincare. This recipe is more than a set of instructions; it’s your launchpad into a world of creativity and personal care.
This guide will give you a solid foundation to create a beautiful, effective cream that brings out your skin's natural radiance. To dive deeper into the ingredient philosophy we follow, check out our post on learning more about the benefits of natural products. Now, let’s get started.
Gathering Your Essential Ingredients and Tools
Making a beautiful, high-performance face cream from scratch is a bit like being a chef. Just like you'd lay out all your ingredients before cooking, getting your formulation station organized makes the whole process run like a dream. We'll walk through everything you need, breaking it down into the three key stages of cream-making: the Oil Phase, the Water Phase, and the Cool Down Phase.
It’s no surprise that so many people are turning to DIY skincare. The demand for natural and organic face creams has exploded, with the market projected to soar to $22.9 billion by 2025. This shift toward conscious, personalized skincare is exactly why we're here, providing top-tier ingredients like peptides and plant stem cells for formulators like you.
The Oil Phase Ingredients
This is where the magic starts. The oil phase creates the lush, emollient foundation of your cream, dictating its texture and how it feels on your skin. These ingredients are what give your cream that rich, moisturizing sensation. We'll gently melt them together into a smooth, uniform liquid before the real action begins.
What you'll need for this phase:
-
Emollients (Oils & Butters): These are the heart and soul of your cream. I'm a big fan of Jojoba oil because its structure is incredibly similar to our skin's own sebum, so it absorbs beautifully without a greasy feel. For a richer, more luxurious texture, you can't go wrong with something like Shea butter.
-
Emulsifying Wax: This is non-negotiable. An emulsifier is the bridge that holds your oil and water together, preventing them from separating into a soupy mess. A reliable choice like Olivem 1000 is perfect for creating a stable, elegant cream.
-
Co-emulsifiers/Thickeners: Think of these as your texture enhancers. Ingredients like Cetyl Alcohol or Cetearyl Alcohol work alongside your main emulsifier to build body, improve stability, and give the final product a more substantial, velvety finish.
The Water Phase Components
Next up is the water phase. This is what delivers hydration and acts as the carrier for all your amazing water-soluble goodies. Getting the ratio of water to oil just right is crucial—it's what determines whether you end up with a light lotion or a rich cream.
Here’s what to gather for this step:
-
Distilled Water or Hydrosol: Always, always use distilled water. Tap water is full of minerals and microbes that can spoil your cream and shorten its shelf life. If you want to add a little something extra, try swapping out the water for a botanical hydrosol, like rose or chamomile. It adds its own subtle properties and a lovely natural scent.
-
Humectants: These are the moisture magnets in your formula. Glycerin is a classic, inexpensive humectant that works by pulling moisture from the air to the surface of your skin, keeping it looking plump and hydrated.
The Cool Down Phase Actives and Preservatives
This is the grand finale, where you transform your simple cream into a powerhouse cosmetic product. These ingredients are delicate and heat-sensitive, so we add them only after the cream has cooled down to below 40°C (104°F). This protects their potency and ensures you get all their benefits.
Your cool-down additions will include:
-
High-Performance Actives: This is where you get to play and really customize your formula. Want to support a firmer appearance? Add some peptides. Looking for antioxidant properties? Plant stem cell extracts are fantastic.
-
Preservative: This is a critical safety step. Any product that contains water must have a broad-spectrum preservative to prevent nasty bacteria, mold, and yeast from growing. For natural formulations, something like Geogard ECT is an excellent choice.
-
Antioxidants: Ingredients like Vitamin E oil are often added here. It’s not a preservative, but it does an excellent job of slowing down the oxidation of your oils, which helps keep your cream from going rancid too quickly.
I see this mistake all the time: people think Vitamin E or rosemary extract can preserve their cream. While they are fantastic antioxidants that protect your oils, they do absolutely nothing to stop microbial growth. You still need a true broad-spectrum preservative to keep your product safe.
If you want to dive deeper into different types of ingredients and what they do, we've got a whole section dedicated to cosmetic raw ingredients you can explore.
Essential Formulation Tools
Finally, having the right gear is just as important as having the right ingredients. Formulating is a science, and precision is everything.
You don't need a full-blown lab, but these tools are essential:
- Digital Scale: Get a scale that measures to at least 0.01 grams. Guessing measurements is a recipe for a failed batch.
- Heat-Proof Beakers: You’ll need at least two—one for your oil phase and one for your water phase.
- Double Boiler or Saucepan: This allows you to gently and evenly heat your phases without scorching them.
- Stick Blender (Immersion Blender): This is the secret weapon for creating a silky-smooth, stable emulsion. A mini-mixer or milk frother can work for very small batches, but a stick blender is best.
- Spatulas: Silicone spatulas are perfect for scraping every last drop out of your beakers.
- pH Strips or a pH Meter: Testing and adjusting the final pH is a pro step that ensures your cream is effective and skin-friendly.
Essential Ingredient Checklist and Their Functions
To make things even easier, here’s a quick-reference table that breaks down the key ingredients you'll need, what they do, and a few options to get you started. This checklist will help ensure you have everything on hand before you begin formulating.
| Ingredient Category | Purpose in Formula | Examples (Link to Skin Perfection) |
|---|---|---|
| Emollients | Provides moisture, texture, and feel. Softens and soothes the skin. | Jojoba Oil, Shea Butter, Squalane Oil |
| Emulsifiers | Binds the oil and water phases together to create a stable cream. | Olivem 1000, Emulsifying Wax NF |
| Humectants | Attracts and holds moisture in the skin, providing hydration. | Glycerin, Hyaluronic Acid |
| Actives | Delivers targeted benefits for appearance like firming and antioxidant support. | Peptides, Plant Stem Cell Extracts |
| Preservatives | Prevents the growth of bacteria, mold, and yeast in water-based products. | Geogard ECT, Leucidal Liquid SF |
| Antioxidants | Protects the oils in the formula from going rancid, extending shelf life. | Vitamin E Oil (Tocopherol) |
This table should serve as a great starting point for gathering your supplies. As you get more experienced, you can start swapping these ingredients to create custom formulas perfectly suited to your skin's needs.
Mastering the Emulsification Process
This is where the real magic happens in your handmade face cream recipe. Emulsification is both an art and a science—it's the process of convincing oil and water, two ingredients that naturally want nothing to do with each other, to come together in a beautiful, stable, and creamy union.
Getting this part right is what separates a luxurious cream from a separated, oily puddle. The idea is to break down the oil and water into tiny droplets and use an emulsifier to keep them suspended together. To pull this off, precision and temperature control are your best friends. It takes a little attention to detail, but the silky, professional-quality result is so worth it.
Heating the Oil and Water Phases
First things first, you need to gently and evenly heat your oil and water phases in separate, heat-proof containers. The goal here is to bring both phases to the exact same temperature, which is typically around 70°C (158°F). This uniformity is absolutely critical for a stable bond.
So, why that specific temperature? It ensures that all the solid goodies in your oil phase, like shea butter and your emulsifying wax, are completely melted into a single, smooth liquid. If one phase is cooler than the other when you mix them, the waxes can start to solidify too early. This can lead to a grainy texture or, even worse, a failed emulsion that separates within a few days. A double boiler or even a simple saucepan with an inch of simmering water works perfectly for this gentle heating.
Combining and Blending to Perfection
Once both your oil and water phases have hit that sweet spot of 70°C (158°F), it's time for the main event. Carefully pour the water phase into the oil phase. You'll see the mixture immediately turn a milky white, which is the first sign that your emulsion is starting to form.
Now, grab your stick blender (also called an immersion blender). This tool is a game-changer for creating a smooth, professional-grade cream.
Here's how to blend like a pro:
- Start with Short Bursts: Make sure the blender head is completely submerged before you turn it on—this prevents hot liquid from splashing everywhere. Start blending in short, controlled bursts of just a few seconds at a time.
- Keep Air Bubbles Out: Try to keep the blender head below the surface of the liquid. Tilting your beaker slightly can help create a nice vortex that pulls the mixture down into the blades without sucking in a bunch of air. Too much air can make your cream frothy and unstable.
- Blend Until It Thickens: Keep blending for about 1-2 minutes. You're looking for a noticeable change in consistency. The mixture will get thicker, become uniformly white, and start to look like a thin lotion.
The secret to a flawless texture is using a stick blender. While a little mini-mixer or milk frother might work for tiny test batches, a stick blender provides the high-shear force needed to break down oil droplets small enough for a truly stable and silky emulsion.
For those who want to truly master the art of emulsification, you can even find inspiration in classic culinary techniques. The core principles of heat, agitation, and binding agents are universal.
The Crucial Cooling Process
After that initial high-shear blend, you're not quite done. The cool-down phase is just as important as heating and blending. As your beautiful new emulsion starts to cool, it will continue to thicken and set into its final, creamy consistency.
To get a perfectly smooth, homogeneous texture, you need to stir the cream gently and intermittently while it cools down. Switch from the stick blender to a silicone spatula or a small whisk for this part. A gentle stir every few minutes stops the outer edges from cooling faster than the center, which can sometimes cause weird inconsistencies in the final texture.
You'll want to keep this up until the cream has cooled to below 40°C (104°F). This is the magic number—the safe temperature to add your delicate, heat-sensitive cool-down ingredients like peptides, preservatives, and essential oils. If you want to dive deeper into the science behind this, you can learn more about what emulsifying wax is and how it works.
This visual guide breaks down the three primary stages of creating your handmade face cream, from preparing the separate phases to adding the final touches.
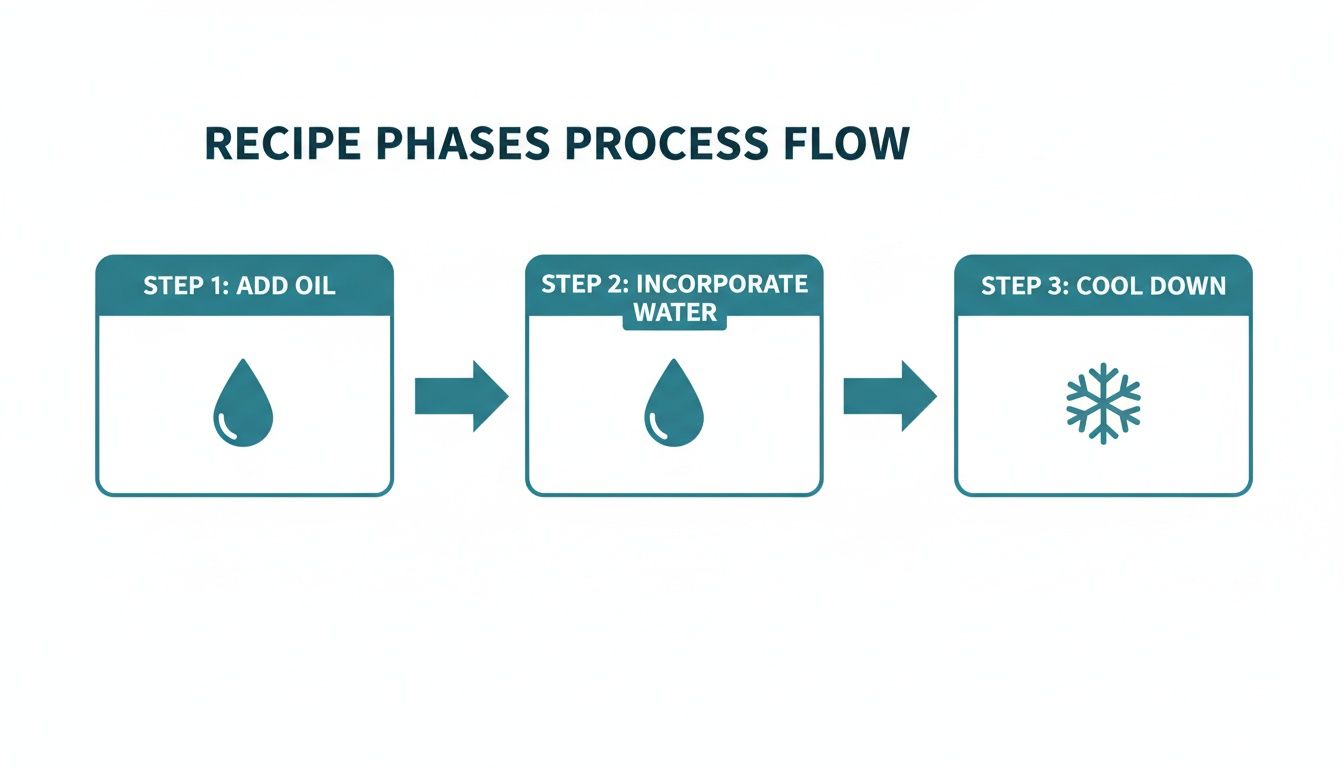
This process flow highlights that each phase—Oil, Water, and Cool Down—is distinct and requires careful handling to ensure the final product is stable and effective.
Bringing Your Cream to Life: Adding Actives and Preservatives
You've done it! Your emulsion is cool, thick, and beautiful. You've created a stable base, but now for the really fun part—turning this simple cream into a powerhouse product that’s customized for your skin. This is what we call the "Cool Down" phase, where timing and a gentle hand are everything. Adding your delicate actives and the all-important preservative at just the right moment is what makes your cream both effective and safe.
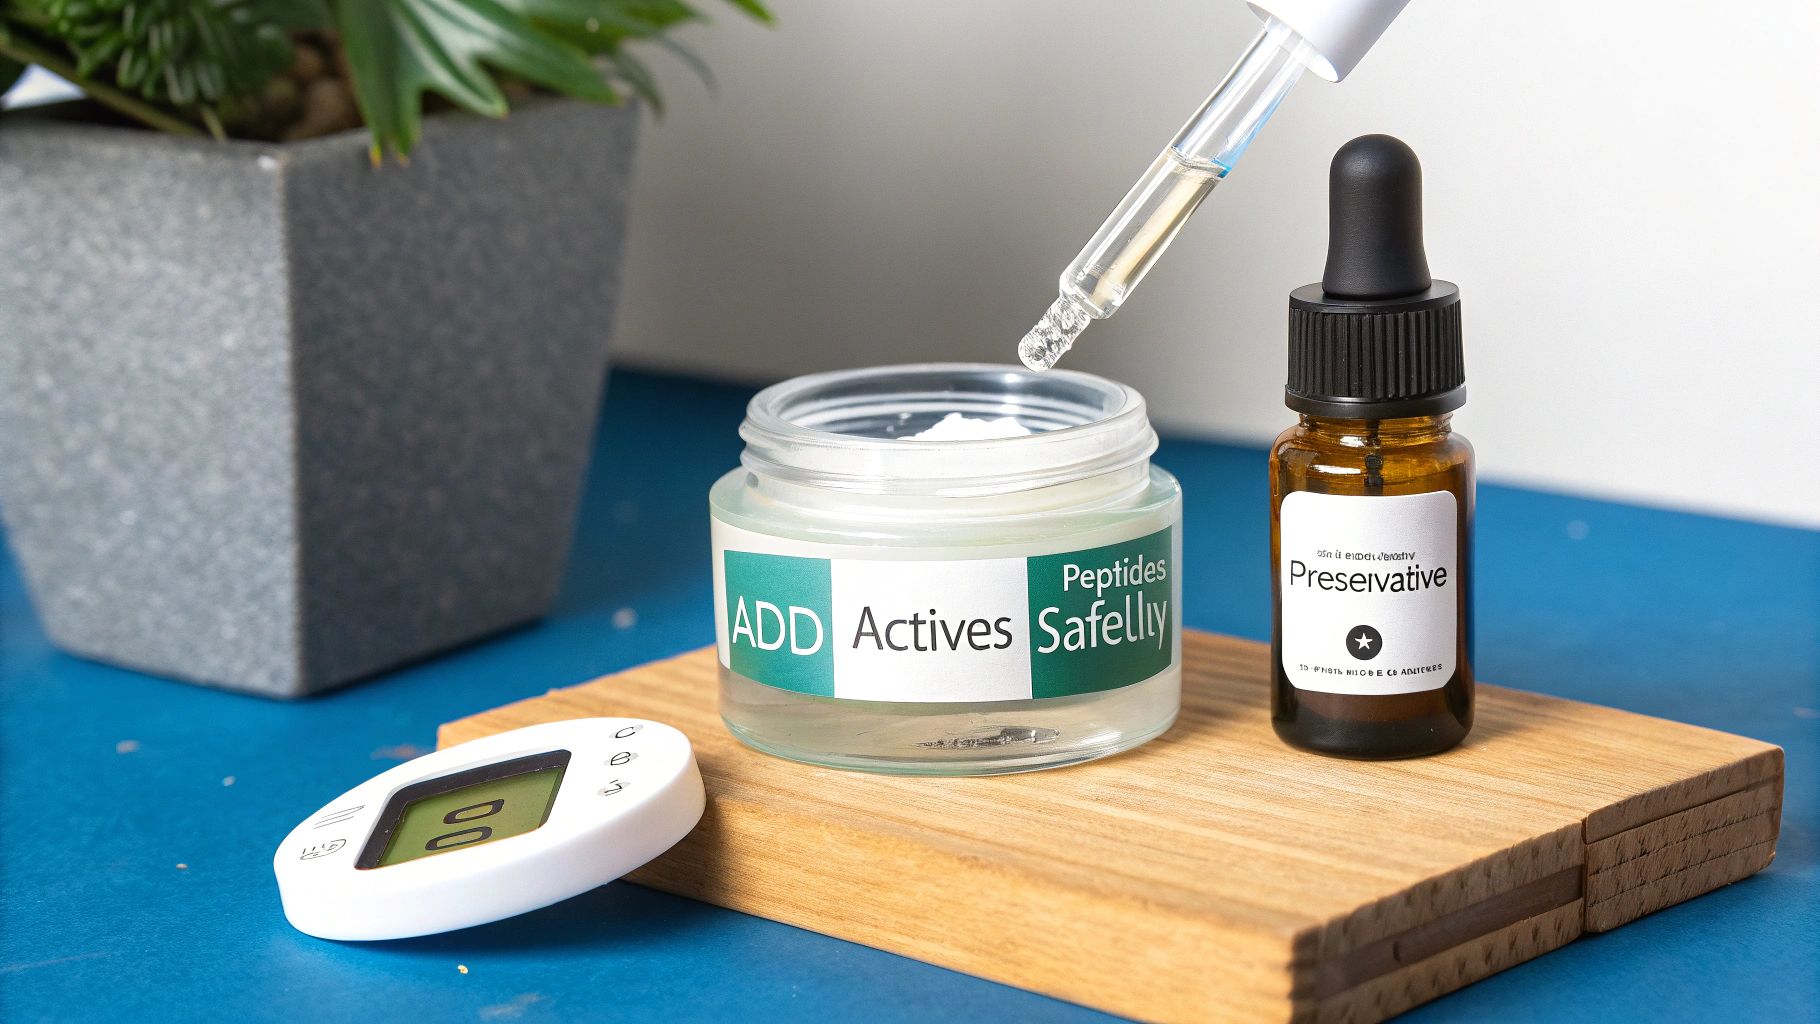
Here's the most important rule of this phase: only add your final ingredients after the cream has cooled to below 40°C (104°F). Actives like peptides are incredibly sophisticated but also very fragile. Heat will destroy their complex structures, essentially making them useless. Tossing them into a hot mixture is just a waste of good ingredients, so always double-check the temperature with a digital thermometer before moving on.
Incorporating High-Performance Actives
This is where you get to play cosmetic chef and tailor the cream to your exact needs. Actives are the concentrated ingredients that do the heavy lifting, delivering visible benefits to your skin's look and feel. The secret is using them at their recommended usage rates to get the best performance without messing up your beautiful emulsion.
You could add things like:
- Peptides: These are my go-to for promoting a firmer, more youthful look. There are many different kinds, each targeting specific concerns, so you can really zero in on your goals.
- Hyaluronic Acid: A true hydration superstar. It pulls moisture into the skin, giving it that plump, dewy appearance. It’s a fantastic addition for just about every skin type.
- Botanical Extracts: Think Green Tea or Licorice Root Extract. These offer antioxidant properties that help shield your skin's appearance from daily environmental stressors.
I've seen many DIYers make the mistake of thinking "more is better." Trust me, it's not. Overloading your cream with too many actives can break the emulsion you worked so hard to create, causing it to separate. Stick to the supplier's guidelines for each ingredient, adding them one by one and stirring gently but thoroughly with a clean spatula after each addition.
Preservation: The Non-Negotiable Step
Okay, let's get serious for a moment. This is, without a doubt, the most critical part of keeping your handmade cream safe. Any product that contains water—which your cream does—is the perfect place for bacteria, mold, and yeast to throw a party. Without a proper preservative, your cream could become contaminated in just a few days, even if you keep it in the fridge.
There's a persistent myth that natural ingredients like Vitamin E, rosemary extract, or grapefruit seed extract can preserve a cream. While these are great antioxidants that stop oils from going rancid, they have zero power against microbial growth. For safety, a broad-spectrum preservative is an absolute must.
A broad-spectrum preservative is designed to fight off a whole range of nasty microorganisms. When you're picking one, make sure it's effective at your cream's final pH. You'll typically add it at a rate of around 1%. If you want to take a deeper dive, we have a helpful guide on choosing a natural skin care preservative.
Checking and Adjusting the Final pH
The final professional touch is checking and, if needed, adjusting your cream’s pH. The pH level is a big deal; it affects how well your preservative works and how compatible the cream is with your skin. Our skin is naturally a bit acidic, with a pH between 4.5 and 5.5. Creating a cream in this range helps support the skin's natural barrier.
Beyond that, most preservatives are only effective within a specific pH window. You can easily check your cream's pH with simple test strips. If it's too high (alkaline), a drop of a weak acid solution (like citric acid mixed with water) will bring it down. If it's too low, a weak base (like a baking soda solution) will raise it. The key is to go slowly, adding just a tiny bit and re-testing until you hit that perfect pH sweet spot.
This is where the real magic of DIY skincare happens. Once you've got the basic cream recipe down, you can start playing the role of a cosmetic formulator, tweaking and adjusting the ingredients to create a moisturizer that's perfectly dialed in for your skin's unique needs. You're moving beyond just following instructions to crafting your own signature formula.
Personalizing your cream is all about making smart, targeted swaps. You don't need to start from scratch. Instead, it's about learning which oils, butters, and actives to substitute to get the exact texture and benefits you're after. This is how you create a cream that feels like it was made just for you—because it was.
Adjusting for Drier or Mature-Looking Skin
If your skin often feels tight, parched, or looks a bit lackluster, enriching your formula with more substantial emollients can be a total game-changer. The idea is to ramp up the cream's moisturizing properties, which helps support your skin's natural barrier and lock in precious hydration.
Consider these powerful swaps:
- Richer Carrier Oils: Instead of a lighter oil, try substituting it with Avocado Oil or Macadamia Nut Oil. These oils are packed with fatty acids, giving them a more substantial, deeply nourishing feel on the skin.
- Luxurious Butters: Swap out a portion of the base butter for something incredibly lush like Murumuru Butter. It's amazing for creating a protective feel that is non-greasy and leaves the skin feeling exceptionally soft.
- Targeted Actives: This is where you bring in the heavy hitters. For skin that needs a boost in firmness and hydration, adding a high-quality Peptide Complex can make a visible difference in promoting a smoother, more resilient appearance.
Tailoring for Oily or Combination Skin
For those with oily or combination skin, the name of the game is hydration without the weight. You want ingredients that help balance your skin's appearance, leaving it feeling fresh and matte—not slick or greasy. It's a huge myth that oily skin doesn't need moisture; it just needs the right kind of moisture.
Here are a few excellent modifications to try:
- Lighter Carrier Oils: Opt for oils that sink in quickly and have a "drier" feel. Grapeseed Oil and Hazelnut Oil are fantastic choices. They're both lightweight and won't leave behind a heavy residue.
- Alternative Hydrosols: Instead of a rich rose hydrosol, consider using Witch Hazel or Tea Tree hydrosol in your water phase. These are well-known for their properties that can help promote a clear-looking complexion.
- Specific Botanical Extracts: Think about incorporating extracts like Willow Bark or Green Tea. These ingredients are prized for their ability to help refine the look of pores while providing great antioxidant support.
A common mistake is trying to strip oily skin with harsh products. A well-formulated handmade cream can provide essential hydration with light, non-comedogenic ingredients, helping to create a much more balanced and happy complexion.
Ingredient Swaps for Different Skin Types
Getting the right blend of ingredients is key to addressing your specific concerns. This table gives you a starting point for swapping out ingredients in the base recipe to better suit your skin's individual needs.
| Skin Type | Recommended Oils/Butters | Suggested Actives/Hydrosols |
|---|---|---|
| Dry | Avocado Oil, Shea Butter, Macadamia Nut Oil | Hyaluronic Acid, Rose Hydrosol, Ceramides |
| Oily | Grapeseed Oil, Hazelnut Oil, Squalane (Olive-derived) | Niacinamide, Willow Bark Extract, Tea Tree Hydrosol |
| Combination | Jojoba Oil, Hemp Seed Oil, Mango Butter | Green Tea Extract, Cucumber Hydrosol, Niacinamide |
| Mature-Looking | Rosehip Seed Oil, Pomegranate Seed Oil, Murumuru Butter | Peptides, Plant Stem Cells, Frankincense Hydrosol |
Think of this as a launchpad for your own experimentation. The best formula is the one that makes your skin feel its absolute best.
Selecting Actives for Specific Appearance Goals
Beyond just general skin type, you can get even more specific by choosing actives that target your personal appearance goals. This is where you can create a truly potent, high-performance product that goes beyond simple moisturization.
- For a Brighter Look: To tackle an uneven skin tone and promote a radiant glow, look into actives like Vitamin C derivatives or Licorice Root Extract.
- For Soothing Support: If your skin often looks red or feels easily irritated, ingredients like Allantoin or Chamomile Extract can provide a wonderful calming and comforting sensation.
The DIY movement is completely reshaping the beauty world. In fact, the face cream market is projected to hit $31.77 billion by 2029. This boom is being driven by people like you, who are turning away from one-size-fits-all products in favor of personalized, handmade recipes that feature clean, effective actives. This is exactly where Skin Perfection shines, offering formulators the ingredients to create moisturizers that target everything from hydration to eyelash enhancement—with peptides shown to boost lash density by 25% in studies. You can discover more about these market trends and ingredient innovations.
Before you start swapping, it helps to know your starting point. If you're not quite sure where your skin falls, you can learn more about the 5 main skin types to get a better handle on its needs. This knowledge is your best guide, ensuring every tweak you make is intentional and effective.
Common Questions About Your Handmade Face Cream
Diving into the world of making your own skincare is an amazing journey, but it’s totally normal to have a few questions bubble up. From making sure your beautiful new cream stays fresh to figuring out what to do when things don't go quite as planned, getting clear answers builds confidence.
Let's tackle some of the most common queries that come up when you start creating your own face cream. Getting these details right is the key to making sure the time and love you pour into your project result in a cream you can use safely and effectively.
How Long Will My Handmade Face Cream Last?
This is one of the most important things to get right. If you’ve followed the recipe and included a broad-spectrum preservative, your cream should stay fresh and stable for 3-6 months.
Proper storage is also a huge factor in its longevity. Always keep your cream in a clean, airtight jar and stash it in a cool, dark place, like a medicine cabinet or a drawer. You'll want to avoid leaving it in a steamy bathroom or on a sunny windowsill, since heat and light can break down those lovely ingredients much faster.
A little pro tip: To keep your cream pristine, always use a clean spatula or scoop to get the product out of the jar. Dipping your fingers straight in can introduce bacteria, which can overwhelm even the best preservative system and seriously shorten your cream's lifespan.
Why Did My Cream Separate After a Few Days?
It’s always a bummer to see your once-perfectly blended cream separate into layers of oil and water. But don't worry, this is a super common hiccup for new formulators. It's simply a sign that your emulsion has "broken" or wasn't quite stable enough to begin with.
A few things could be the culprit here:
- Temperature Mismatch: If your oil and water phases weren't at the same temperature when you combined them, the emulsifier might not have been able to create that strong, lasting bond it needs to.
- The Proportions Were Off: Using a little too much oil or not quite enough emulsifying wax can throw the whole formula out of balance, making it likely to separate. Precision is your best friend here, so always, always use a digital scale.
- Not Enough Blending: If you don't blend long enough or hard enough with your stick blender, the oil droplets can be left too large to stay suspended in the water. You're usually looking for a solid 1-2 minutes of high-shear blending to create a tight, stable emulsion that will last.
If this happens to you, the best bet is to start the batch over, keeping a close eye on these three factors.
Can I Make This Recipe Without a Preservative?
For any recipe that contains water—and that includes this face cream—the answer is a firm no, not if you want it to be safe. Water is the perfect breeding ground for all sorts of nasty things like bacteria, mold, and yeast. Without a broad-spectrum preservative, a cream can become contaminated in just a few days, even if you keep it in the fridge.
There's a common myth that natural ingredients like Vitamin E, grapefruit seed extract, or rosemary extract can act as preservatives. While these are fantastic antioxidants that stop oils from going rancid, they do absolutely nothing to stop microbial growth. Your safety should always be the number one priority, which makes a proper preservative a non-negotiable part of your formula.
What Is the Best Way to Patch Test a New Cream?
Patch testing is a simple but absolutely crucial step before you start slathering on any new skincare product, especially one you’ve made yourself. This quick little test helps you make sure the ingredients vibe with your skin and won't cause any irritation.
Here’s how to do it right:
- Apply a small, dime-sized amount of the finished cream to a discreet patch of skin. Great spots for this are the area just behind your ear, on your inner wrist, or in the crook of your elbow.
- Now, just leave it alone and wait for at least 24 hours.
- After the time is up, check the spot for any signs of redness, itching, or irritation.
If your skin looks and feels totally normal, your cream is likely good to go! If you notice any kind of reaction, though, it's best to stop using it and try to figure out which ingredient might be the cause.
Ready to start your DIY skincare journey with high-quality, trusted ingredients? From potent peptides to luxurious emollients, Skin Perfection has all the supplies you need to create your perfect handmade face cream. Explore our full collection of natural and organic ingredients at https://www.naturalorganicskincare.com.