
 Buy with Prime


Making your own goat milk lotion is a beautiful, rewarding process. At its core, you're simply combining a heated water phase (your goat milk and distilled water) with a heated oil phase (think luscious shea butter and nourishing oils). You'll bring them together through emulsification and then, once it cools, add a preservative to keep it fresh. The best part? You have complete control over every single ingredient, creating something truly perfect for your skin.
Why Make Your Own Goat Milk Lotion

Stepping into the world of DIY skincare is incredibly empowering. When you learn how to make goat milk lotion, you aren't just following a recipe—you're crafting a product that's perfectly tuned to what your skin loves.
This hands-on approach means you get to pick every ingredient, making sure your final lotion is pure, effective, and completely aligned with a clean-beauty philosophy. Goat milk itself is a superstar in skincare, loaded with fatty acids and nutrients that make lotions feel incredibly luxurious and moisturizing.
When you make your own, you guarantee you're getting all that goodness without any of the unnecessary fillers. It's this creative control that leads so many skincare lovers to explore our guides and create their own beautiful skincare products.
The Shift Toward Natural Ingredients
The move toward natural skincare isn't just a fleeting trend. It’s a genuine shift in how we think about beauty and wellness. More and more, we want to know exactly what we’re putting on our bodies, and we're demanding products that are both clean and effective. You can see this happening on a global scale.
The global goat milk cosmetics market has seen some incredible growth, which really shows how much people want natural skincare. Valued at USD 4.04 billion, the market is expected to more than double, reaching USD 8.28 billion by 2033.
This kind of growth isn't an accident. It points to a deep-seated preference for products made with recognizable, hard-working natural ingredients. You can dive deeper into the numbers in this goat milk cosmetics market report.
The Benefits of a DIY Approach
Whipping up your own lotion at home comes with some pretty amazing perks that go way beyond just picking out ingredients.
Here’s what you gain:
- Total Customization: Is your skin dry, oily, or somewhere in between? You can tweak the oils and butters to create a texture and feel that’s just right for you.
- No Unwanted Additives: You get the final say on what goes in—and what stays out. This is a game-changer if your skin is sensitive to common additives found in commercial products.
- Unbeatable Freshness: There’s simply nothing like using a lotion you've just made yourself. The quality and feel are often miles ahead of anything you can buy off a shelf.
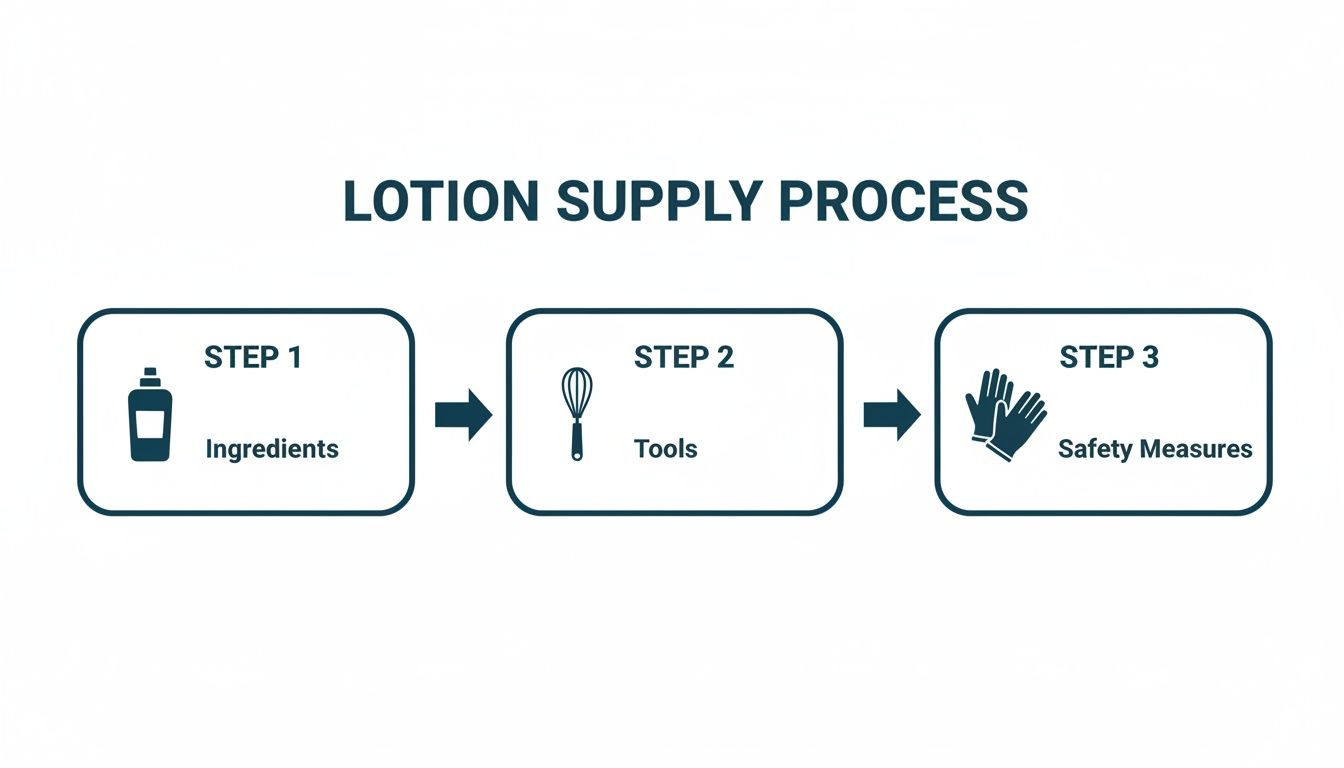
Your Essential Ingredients and Tools
Before you even think about mixing up your first batch of goat milk lotion, let's get you set up for success. Just like a chef preps their ingredients before cooking, gathering everything you need first makes the whole process go smoothly. No frantic searching for a beaker mid-emulsion!
Making lotion is a bit of a science. Every ingredient has a job to do, from the liquids that create the base to the emulsifiers that magically bring oil and water together into that creamy, dreamy texture we're after. For this recipe, we'll work in three main stages: the water phase, the oil phase, and the cool-down phase.
Let's break down what you'll need.
The Goat Milk Lotion Ingredient Checklist
Here’s a look at the key players in our goat milk lotion recipe, broken down by what they do. Quality is everything here—using fresh, high-quality ingredients will make a world of difference in your final product.
| Category | Ingredient | Recommended Options | Purpose in Lotion |
|---|---|---|---|
| Water Phase | Goat Milk & Water | Goat Milk Powder, Distilled Water | Forms the hydrating base of the lotion. |
| Oil Phase | Butters & Oils | Shea Butter, Avocado Oil, Sweet Almond Oil | Provides moisturizing properties and determines the lotion's texture and feel. |
| Emulsifier | Emulsifying Wax NF | Olivem 1000, Ritamulse SCG | Binds the water and oil phases together to create a stable, creamy emulsion. |
| Thickener | Cetyl Alcohol | Stearic Acid | Adds body, thickness, and a rich, velvety feel to the final product. |
| Preservative | Broad-Spectrum | Optiphen Plus, Liquid Germall Plus | Prevents the growth of bacteria, mold, and yeast, ensuring the lotion is safe. |
| Cool Down | Fragrance/Essential Oil | Lavender, Chamomile, Fragrance Oil | Adds a beautiful scent to your lotion. (Optional) |
Sourcing high-quality butters, oils, and other key components is crucial. If you want to learn more about your options, feel free to explore our guide on cosmetic raw ingredients.
Essential Tools for Precision and Safety
Having the right tools is just as important as having the right ingredients. When you're making skincare, you want to be precise and safe—this isn't the time for guesswork.
Pro Tip: Before you start, create a clean workspace. Wipe down your counters, scale, and tools with a 70% isopropyl alcohol solution. This simple step is your best defense against contamination and is key to giving your lotion a healthy shelf life.
Here's the equipment you’ll want to have on hand:
- Digital Scale: Accuracy is your best friend. You'll need a digital scale that measures down to 0.01 grams for precise, repeatable results.
- Immersion Blender: This is the secret to a perfect emulsion. A good stick blender creates the high-shear force needed to bind oil and water into a stable, silky lotion that won't separate.
- Heat-Resistant Containers: Grab at least two heat-proof beakers or pyrex-style glass measuring cups. You'll need them to heat your oil and water phases separately and safely.
- Sanitized Lotion Bottles or Jars: Get your final containers cleaned, sanitized, and ready to go before you start. You'll be glad you did when your beautiful lotion is ready to be bottled.
- Safety Gear: Please don't skip this! Always wear safety goggles and gloves. You're working with hot liquids, and protecting your eyes and skin is a must.
Alright, with all your ingredients measured out and your workspace clean and ready, it's time for the fun part. Making your own goat milk lotion is a pretty methodical process, but it's incredibly rewarding. We’ll walk through it in distinct phases: the heated water phase, the heated oil phase, and then the cool-down phase, which is where the real magic happens.
This little chart gives you a quick visual of the main supplies you've just gathered.
As you can see, a beautiful lotion really comes down to three things: top-notch ingredients, the right tools to get the job done, and a serious commitment to keeping things clean and safe.
Preparing the Heated Phases
First things first, you're going to be working with two separate heated mixtures. Keeping them separate until the right moment is absolutely crucial for getting a perfect, stable lotion.
- Heated Water Phase: Grab your first heat-resistant beaker and combine the distilled water with the goat milk powder. Give it a gentle whisk until all the powder has dissolved completely. Now, set this beaker in a double boiler or a simple saucepan filled with a few inches of simmering water.
- Heated Oil Phase: In your second beaker, it's time to combine your heavier ingredients. This means your butters (like shea), liquid oils (like avocado), the emulsifying wax, and any thickeners you're using, such as cetyl alcohol. Place this beaker in its own separate double boiler.
The idea here is to gently and evenly heat both mixtures until they reach about 160°F (71°C). This specific temperature is important because it ensures all the waxes and butters are totally melted and, just as critically, that both phases are hot enough to bond together properly. Keep a close eye on them with a digital thermometer.
The Art of Emulsification
Pay close attention, because this is the single most important moment in the entire process. Emulsification is how we convince oil and water—two things that absolutely do not want to mix—to come together and form a single, creamy lotion. Nail this, and you'll end up with a product that looks and feels professionally made.
Once both your oil and water phases have hit that 160°F mark, pull them off the heat. Very carefully, pour the oil phase directly into the water phase. Don't be alarmed when they immediately try to separate; that's completely normal.
Now, it's time for your immersion blender. Make sure you submerge the head of the blender all the way into the mixture before you turn it on—this will save you from getting splashed with hot liquid. Blend in short bursts of 15-20 seconds at a time, moving the blender around the beaker to incorporate everything. Between bursts, use a spatula to give it a quick stir.
You're watching for a key visual sign called "trace." This is when the mixture starts to thicken just a bit. You'll know you've hit it when you can drizzle a little lotion from your spatula and it leaves a faint trail on the surface before sinking back in. That's your cue that the emulsion is starting to form successfully.
Key Takeaway: Whatever you do, don't over-blend. A few short bursts are really all it takes to get the job done. Blending for too long can whip too much air into your lotion or even break the delicate emulsion you just created, which can lead to a separated, unstable mess later on.
If you're a skincare nerd like me and want to get into the nitty-gritty science of it, our guide on how to emulsify oil and water is a fascinating deep dive.
The Cool-Down Phase
Once you've achieved trace, your lotion is emulsified but still very hot and quite liquidy. It needs to cool down nice and slow to develop its final thick, creamy texture. Just set the beaker aside on your counter and give it a gentle stir every 5 to 10 minutes. This little step is important because it prevents a skin from forming on the surface and ensures your lotion cools down evenly.
You'll see it gradually become thicker and more opaque as it cools. Once the temperature drops below 120°F (49°C), you're in the home stretch and ready for your final additions. This is the sweet spot for adding your heat-sensitive ingredients, like your broad-spectrum preservative and any optional fragrances or essential oils.
Adding these ingredients when the lotion is too hot can destroy their effectiveness—this is especially true for the preservative, which is non-negotiable for keeping your product safe from bacteria and mold. Stir them in thoroughly until they are completely mixed in. And just like that, your beautiful, handmade goat milk lotion is finished and ready to be poured into your clean bottles or jars.
Ensuring Your Lotion is Safe and Stable
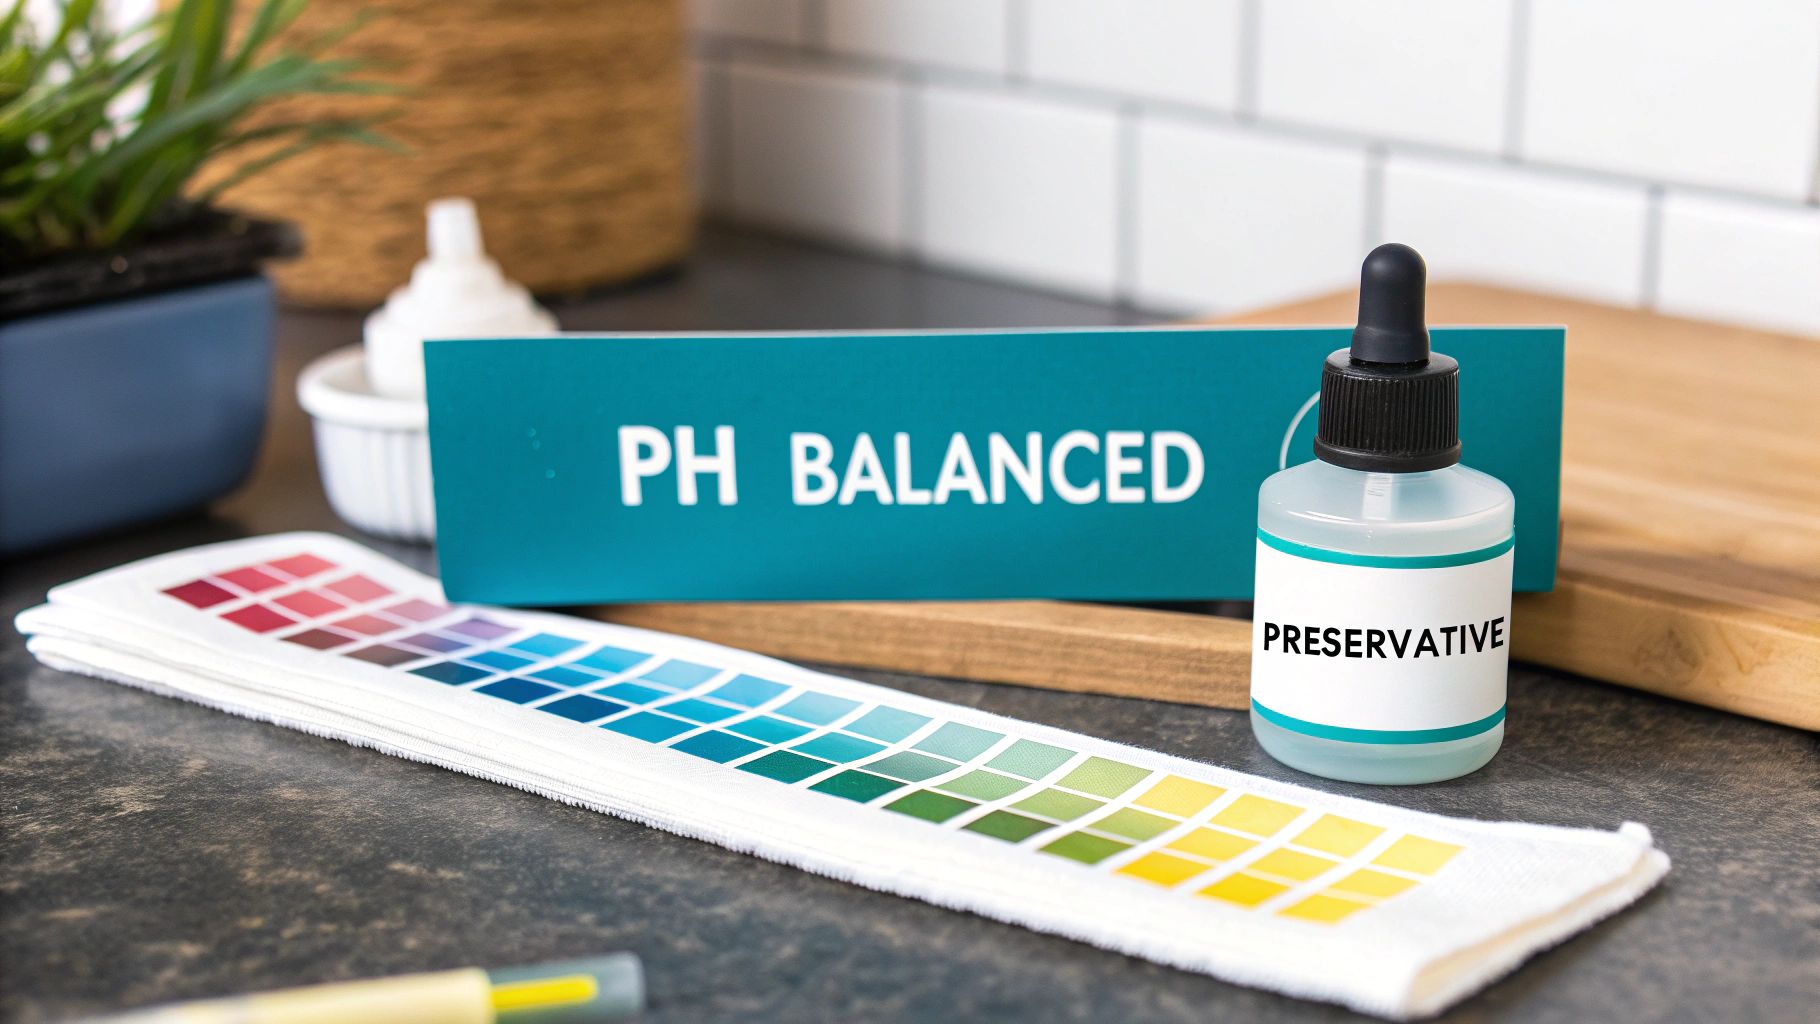
Okay, you've done the hard part and created a beautiful, creamy emulsion. High five! But before you start bottling it up, we need to talk about two absolutely critical details that take your creation from a kitchen craft to a high-quality, safe product: preservation and pH balance.
These steps aren't just suggestions; they're non-negotiable for making sure your goat milk lotion is safe to use and feels fantastic on the skin.
Anytime you introduce water into a formula—and we did, with both distilled water and goat milk—you're rolling out the welcome mat for bacteria, yeast, and mold. This is exactly why a broad-spectrum preservative isn't just an add-on; it's a must-have.
Without it, your gorgeous lotion could turn into a funky science experiment in just a few days. Adding a preservative during the cool-down phase is the only way to guarantee your product stays safe and stable for months.
Why Preservation is a Must
Think of your preservative as the security guard for your lotion. Its only job is to protect your formula from microscopic invaders that will spoil your hard work. For a recipe like this one, you need what's called a broad-spectrum preservative, meaning it fights off all the major microbial culprits.
- Bacteria: These can cause funky changes in your lotion's color, scent, and texture.
- Yeast: Often shows up as little pink or black spots and can mess with the consistency.
- Mold: You'll know it when you see it—typically fuzzy spots right on the surface.
There are many fantastic, clean-beauty-approved preservatives out there today. When you pick one, always follow the manufacturer's recommended usage rate, which is usually somewhere between 0.5% to 1.5% of your total formula weight. You can find some great information and options by checking out our resources on natural skin care preservatives.
The Importance of a Balanced pH
The next crucial check is your lotion's pH. The term "pH" just refers to how acidic or alkaline something is. When it comes to skincare, we're aiming for a final product that's slightly acidic, because that's what your skin naturally is.
An ideal pH for lotion is between 4.5 and 5.5. A product in this sweet spot feels gentle and supports your skin's appearance. If the pH is too high (alkaline), it can feel drying and disrupt your skin's balance.
Testing is super simple. Once your lotion has cooled down completely to room temperature, just dab a small sample onto a pH strip or use a digital pH meter to get a reading.
If your pH is a bit too high, you can easily lower it. Just add a few drops of a diluted citric acid solution, mix it in really well, and test again. Keep doing this—a few drops at a time—until you hit that perfect range. Getting the pH right is that final professional touch that truly elevates your homemade lotion.
Finally, to make all this work last, proper storage is key. For some great tips, check out this guide offering general guidance on proper storage for cosmetic products.
Taking Your Lotion to the Next Level with High-Performance Actives
Once you’ve nailed the base recipe for your goat milk lotion, the real fun begins. This is where you can start customizing and transforming a beautiful handmade product into a truly high-performance formulation that rivals what you’d find in high-end boutiques.
The secret is adding potent actives during the cool-down phase. Think of these as concentrated boosters that target specific cosmetic goals. Incorporating them is super simple—just add them to your lotion once it has cooled below 120°F (49°C) and give it a gentle stir until everything is fully blended.
Why You’ll Love Peptides and Plant Extracts
Two of my favorite types of actives to work with are peptides and plant stem cell extracts. They each bring something unique to the table and can seriously elevate your lotion, helping you achieve a more radiant, youthful-looking appearance.
- Peptides: These are amazing little powerhouses. As short chains of amino acids, they are known to visibly improve skin firmness and smooth out texture, making skin appear more youthful.
- Plant Stem Cell Extracts: Sourced from resilient botanicals, these extracts are packed with compounds that help promote a vibrant, healthy-looking complexion.
When you're choosing an active, always check the supplier's recommended usage rate. For most peptides and plant extracts, you'll be looking at a range between 1% and 5% of your total formula's weight. If you want to dive deeper into how incredible these ingredients are, we break it all down in our guide explaining what a peptide serum is.
Crafting Your Own Custom Blend
The real beauty of making your own skincare is the ability to tailor it perfectly to your needs. You might add a peptide known for smoothing the appearance of fine lines, or maybe a botanical extract celebrated for its incredible hydrating properties.
For those who love getting their hands dirty, you can even take it a step further by learning to cultivate your own high-performance ingredients, like homegrown aloe vera. It's another rewarding layer to the DIY experience.
Pro Tip: When you're just starting out, stick to one or two actives at a time. This lets you see exactly how your skin responds to each new ingredient before you start creating more complex formulas. And always, always add them during the cool-down phase—this protects their delicate structures from heat damage.
This kind of personalization is exactly why natural, effective skincare is seeing a worldwide boom. Take the Asia Pacific region, for example—it has become the fastest-growing market for goat milk cosmetics. The goat milk body lotion segment alone is projected to see a CAGR of over 12.5% from 2025 to 2033 in that part of the world, which just shows how much people value premium, natural products. By adding these high-performance actives, you're tapping into that powerful trend right from your own kitchen.
Common Questions About Making Goat Milk Lotion
When you first start making your own goat milk lotion, you're bound to have some questions. It's all part of the fun! To give you a head start, we've put together answers to some of the most common things we get asked by fellow DIY skincare lovers.
Can I Use Fresh Goat Milk Instead of Powdered?
While the idea of using fresh-from-the-farm goat milk is lovely, it brings some serious challenges to lotion making. The natural fats in fresh milk can make it a real challenge to get a stable emulsion, and its high water content is basically an open invitation for bacteria and mold. This drastically shortens your lotion's shelf life.
This is why we always, always recommend using goat milk powder that you mix with distilled water. You get all the beautiful, skin-loving properties of goat milk but in a consistent, stable form that’s much safer and easier to work with. The end result is a gorgeous, reliable lotion every time.
My Lotion Separated After a Few Days. What Went Wrong?
It’s so frustrating when your perfect, creamy lotion turns into a separated mess. Don't worry, it's a super common issue when you're starting out, and it's almost always an emulsification problem that you can fix.
Usually, one of these three culprits is to blame:
- Temperature Mismatch: Your oil phase and your water phase need to be at a similar, warm temperature when they meet. If one is way hotter or cooler than the other, they won't want to bond properly.
- Not Enough Blending Power: A simple whisk just won't cut it here. To create a stable emulsion, you need the high-shear force of an immersion (stick) blender. This breaks the oils and water into tiny droplets that can stay mixed together.
- The Ratios Are Off: Making lotion is a bit like baking—it's a science. If you don't use enough emulsifier for the amount of oil and water in your recipe, the bond will be weak and eventually give up.
Go back and double-check your recipe's percentages and think about your blending technique. A strong emulsion, created at the right temperature, is your secret weapon for a lotion that lasts.
My Two Cents: Don't rush the blending step. It's the most critical part. I find that using an immersion blender in short, controlled bursts for about one to two minutes is the magic number. This ensures everything is truly combined and is your best defense against separation down the road.
How Long Will My Homemade Goat Milk Lotion Last?
If you use a good broad-spectrum preservative and keep your tools and workspace clean, your homemade goat milk lotion should be good for about 6 to 9 months.
To get the most out of every batch, store your lotion in a cool, dark place—away from sunny windowsills or steamy bathrooms. And always use a clean pump or a little spatula to get it out of the jar. This helps prevent any unwanted germs from getting in. If you ever notice the color, smell, or texture changes, it's time to say goodbye and whip up a fresh batch.
Do I Really Need to Use a Preservative?
Yes, absolutely. This is the one rule you can't break. Any recipe that contains water (and that includes lotion) is a playground for bacteria, yeast, and mold. The scary part is that these things can start growing long before you can see or smell them.
Using a broad-spectrum preservative is an essential safety measure. It's what keeps your beautiful creation pure and safe for you and your family to use for months.
Ready to get started with ingredients you can trust? At Skin Perfection, we have everything you need, from rich, nourishing butters and oils to powerful actives that promote a youthful appearance. We're here to help you create safe, effective, and beautiful skincare right in your own kitchen. Come explore our full range of lotion-making supplies today.