

 Buy with Prime
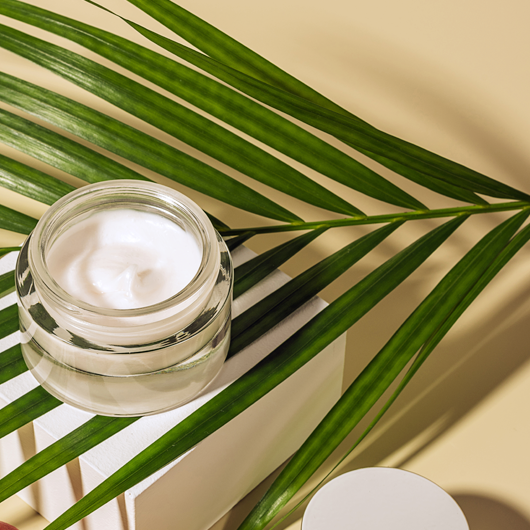


You just bought a bottle of rosehip seed oil, and now it's sitting next to your cleanser, vitamin C, moisturizer, and sunscreen like it has no assigned job. That's usually where the confusion starts. The oil looks simple, but the way you place it in a routine decides whether it feels silky, pills under SPF, or just sits there doing too much.
Rosehip seed oil for face use works best as a steady, low-drama step. Its value comes from a linoleic acid-rich fatty acid profile, plus its well-known vitamins A, C, and E content, which is why it's often used to support hydration and the look of texture over time rather than chase instant change. Clinical evidence points to visible facial shifts after 5 to 8 weeks of daily use, and a 2025 pilot study of topical Rosa canina oil reported texture score improvement from 6.90 to 5.03 with better wrinkle depth, porphyrin levels, and smoothness (2025 pilot study summary). Controlled human studies on rose hip products also showed gains in wrinkles, moisture, and elasticity, with measurable improvement by about the 8th week (PMC review).
If you want the practical version, think of rosehip seed oil as a barrier-support ingredient, not a fast corrective treatment. That mindset makes the routine easier to build, because you stop waiting for a dramatic overnight result and start using it the way it performs best, consistently, in a thin layer.
Table of Contents
- Why Rosehip Seed Oil Deserves a Spot in Your Routine
- The Exact Application Method for Best Absorption
- Damp Skin Versus Dry Skin Application
- Layering Rosehip Oil with Actives and Sunscreen
- DIY Serum Recipes and Sourcing Quality Oil
- Storage Tips and Precautions Before Your First Use
Why Rosehip Seed Oil Deserves a Spot in Your Routine
A client opens a fresh bottle of rosehip oil, sets it beside a hyaluronic serum, and asks the same thing I hear all the time, where does this go? That question matters, because rosehip seed oil behaves differently from watery serums, cream moisturizers, and thick occlusives. It is light, but it still leaves a film, so the place you put it in the sequence affects comfort and finish.
What gives it value
The oil's skin appeal comes from its composition. It is commonly described as rich in vitamins A, C, and E and essential fatty acids, especially linoleic acid, which is why it is used when the goal is to support the barrier and hold onto moisture. Independent skincare analysis links those lipids to less transepidermal water loss and better hydration, which makes the oil useful for dry, dehydrated, or post-inflammatory skin (PMC review).
That composition also explains the texture story. When skin is thirsty, rough, or a little uneven, rosehip seed oil can make the surface feel smoother over time, but only if you keep applying it. It is not a resurfacing shortcut, and it does not behave like an exfoliant. It behaves like support.
What to expect from real use
The time frame is part of the deal. Clinical evidence suggests facial changes are gradual, not immediate, and generally show up after several weeks of regular application (2025 pilot study summary). That lines up with the broader rose hip evidence base, where meaningful changes were seen by about the 8th week in controlled human work. Give it a real trial, not a single night.
For routines that already include hydrators, rosehip oil works best as the closing soft layer after lighter products. If you are building around a hydrating mask such as HydroGlow Anti-Aging Night Mask, the oil usually makes more sense as the next step or on alternate nights, not stacked so heavily that the skin feels greasy. The point is balance, not saturation. For more context on beauty oils, see this oil benefits guide.
The Exact Application Method for Best Absorption
A face that gets slick too fast usually means the oil was overapplied, not that rosehip seed oil is wrong for the routine. Pouring it into the hand and spreading it like body lotion creates drag, wastes product, and leaves more on the surface than the skin can use. A controlled method gives better coverage and less mess.
Use the thin-film method
Start with 2 to 4 drops, keeping the lower end for oily or combination skin and the higher end for drier faces. Warm the drops between your palms for a moment, then press them over the cheeks, forehead, chin, and any dry patches instead of rubbing the oil across the face. If the skin still looks coated after about 10 minutes, the amount was too high.
Practical rule: rosehip oil should leave a light sheen, not a slick layer.
Layering order matters. If you want a fuller breakdown of how oil fits into a routine, the oil-based versus water-based serums guide is the cleanest place to start. Rosehip oil usually sits after lighter water-based steps, and a short pause before moisturizer or sunscreen helps reduce pilling when the routine has several layers (application guide). Keep the finish light enough that the skin still feels breathable. If a night mask is part of the routine, use it in a way that does not crowd the oil or leave the face heavy.
Build frequency slowly
Once-daily use is the safest starting point. If the skin stays calm, you can move to twice daily, but there is no reason to rush that. Rosehip oil should make the routine feel steadier, not more crowded.
The feedback is easy to read. If the face feels soft and comfortable after application, the amount is about right. If it looks shiny, feels tacky, or makes makeup and SPF slip, the layer is too thick.
I prefer to treat this step as the finish, not the treatment itself. That keeps the application precise and makes the routine easier to keep up with.

Damp Skin Versus Dry Skin Application
Most rosehip oil advice gets muddy. Some routines say to apply it on damp skin, others insist the face should be completely dry, and both camps have a point. The difference comes down to what you want the oil to do and how much control your skin needs.
Why damp skin can work
Slightly damp skin can help the oil spread faster and feel more cushioned on contact. That can be useful for very dry skin, especially when you want the face to feel less tight after cleansing. The oil glides more easily, and the skin often feels like it drinks in the layer more quickly.
Why dry skin gives more control
Dry skin gives you better readout on absorption. This matters if you're oily, combination, acne-prone, or sensitive, because you can see exactly how the oil behaves before you put anything else on top. A dermatology video specifically recommends dry skin for rosehip oil because dampness can change absorption, and the practical advice across many guides is inconsistent about whether the skin should be wet or dry (dermatology video). That inconsistency is why I prefer dry skin, then damp skin only when the face is chronically dehydrated or feels stripped.
Best default: apply on dry skin unless your skin is very dry and you need more slip.
For routine-building, a water-based layer like a hyaluronic product comes first, then a light moisturizer if you use one, then rosehip oil as the final seal before SPF in the morning or as the last leave-on step at night. If you make your own hydration products, Sodium Hyaluronate Powder Pure Hyaluronic Acid is a practical way to build a water-based step before the oil, since it's a cosmetic-grade powder used for custom hydrating serums and creams.
Skin type makes the choice easier:
- Dry skin: damp application can feel more comfortable.
- Oily skin: dry skin keeps the finish lighter.
- Combination skin: dry skin usually prevents the T-zone from feeling overloaded.
- Sensitive skin: dry skin offers more control, and less surprise.
For broader layering logic, this skin flooding guide helps clarify why water content and oil placement aren't the same thing. Once you separate those ideas, the damp-versus-dry debate gets a lot less confusing.
Layering Rosehip Oil with Actives and Sunscreen
Rosehip seed oil fits cleanly into a routine only when you respect the order of operations. Water-based products usually go first, oils go after them, and sunscreen stays the final step in the morning. That rule keeps texture under control and helps avoid the gummy, pilled finish that ruins otherwise good routines.
Morning and evening routines
A straightforward morning sequence looks like this, cleanse, apply a water-based active if you use one, moisturize lightly if needed, then either skip the oil or use only a tiny amount if your skin is very dry, and finish with sunscreen. The reason I'm cautious with morning oil use is simple, sunscreen needs to remain the top layer, and heavy layering can make it harder to sit evenly on the skin.
At night, rosehip oil is easier to place. Cleanse, apply your water-based serum, let it settle, add moisturizer, then press in the oil. If your skin tolerates richer textures, that's the cleanest slot for it. The layering order guide from the earlier section on product sequencing reinforces this sequence, and it's the same logic I use in formulation work (order guide).
Where irritation tends to happen
Rosehip oil itself is generally used as a leave-on facial oil, but the trouble usually shows up when people stack it with strong exfoliants too quickly. If you already use retinoids, AHAs, or BHAs, start with rosehip oil on alternate nights so you can tell whether the skin is reacting to the active, the oil, or the combination. Some sources also recommend not pairing it with strong retinoids or exfoliants at first, which is sensible if your barrier is already stressed (night use and actives guidance).
Simple rule for tolerance: introduce rosehip oil on the calmest nights in your routine first.
That same caution applies to makeup days. Too much oil before SPF can make pilling more likely, especially if you've already layered multiple serums. Keep the oil amount low, press it in, and give the skin a few minutes to settle before sunscreen goes on.

DIY Serum Recipes and Sourcing Quality Oil
Some readers want to use rosehip seed oil straight from the bottle. Others want a formula built around it. Both approaches can work, but once you start blending your own serum, the ratio matters more than the marketing copy on the label.
Two simple blends that are easy to repeat
For a hydrating oil-serum, combine 2 teaspoons rosehip seed oil with 1 teaspoon a light hyaluronic gel base in a small sanitized pump or dropper bottle, then shake gently before each use. This gives a more cushiony texture without making the blend feel heavy. If you want a richer nighttime formula, mix 2 teaspoons rosehip seed oil, 1 teaspoon jojoba or squalane, and 2 drops vitamin E in a dark glass bottle.
Formulation rule: keep custom blends simple enough that you can tell what your skin likes and what it doesn't.
If you prefer to make the water phase yourself, a guided how-to-make-face-serum recipe is a useful starting point before you add an oil layer. For formulators who want more control over hydration, a powdered hyaluronic ingredient can be easier to work with than a premixed serum. That is where Sodium Hyaluronate Powder Pure Hyaluronic Acid comes in, since it lets you make a fresh water-based serum and then seal it with rosehip oil.
What to look for when buying the oil
Choose cold-pressed oil in dark glass packaging, and look for a supplier that clearly states quality and sourcing details. Rosehip oil is sensitive to heat and oxidation, so packaging and storage really do affect how it performs on the face. If you are infusing your own oil, use dried rose hips, keep the infusion below 100°F if you use heat, and give it at least a 2-week room-temperature infusion in a cool, dark place (home infusion guide).
The wrong plant material can spoil a batch before it ever reaches skin. Fresh or poorly dried rose hips add moisture, and moisture can compromise the oil. A proper bottle and careful storage habits protect freshness from the start, which matters if you want a formula that still feels clean and usable by the time you finish it.
Storage Tips and Precautions Before Your First Use
Rosehip seed oil doesn't stay elegant forever. Heat, light, and air all push it toward oxidation, so storage matters as much as application. I keep it in a cool, dark cabinet with the cap tightly closed, and I tell clients to treat it like a fresh ingredient, not a bottle that can sit open beside the sink.

Patch test before full-face use
A 24-hour patch test is the safest first step, especially if your skin is reactive. Test a small amount on the inner forearm or wrist, then watch for redness, itching, warmth, or a raised reaction before putting it on the face. That small pause saves a lot of guesswork later.
The other mistake is over-application. Too much oil can leave residue, interfere with sunscreen, and make combination skin feel heavy. Use the lowest amount that gives you a comfortable finish, then adjust only if your skin clearly wants more.
Keep expectations realistic
Rosehip oil is not a quick fix, and it should never be treated like one. The facial changes linked to this ingredient show up after 5 to 8 weeks of steady daily use, not after a single application (2025 pilot study summary; PMC review). That's why a calm, repeatable routine beats experimental layering every time.
A short bookmark list helps:
- Store it cool and dark.
- Patch test first.
- Use 2 to 4 drops, not more.
- Press it in, don't rub.
- Let actives and SPF keep their order.
- Give it weeks, not days.
If you want naturally derived skincare that fits this kind of routine, Skin Perfection carries formulas and DIY supplies that work well with a simple, ingredient-aware approach. Build your rosehip routine with products that respect layering, freshness, and skin tolerance, then keep the application consistent long enough to see what your skin does.