

 Buy with Prime
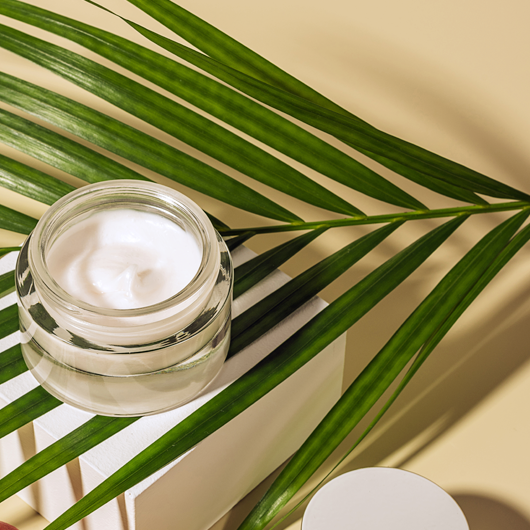


You're probably here because body butter was easy, oil blends were forgiving, and lotion feels like the next real step. It is. A good body lotion has the slip of water, the cushion of oils, and the smooth finish that makes skin feel soft instead of coated. The challenge is that lotion isn't just mixed. It's emulsified, preserved, and handled with enough precision that it stays stable in the bottle.
That's the part many beginner tutorials rush past. They give you a list of ingredients, a quick stir, and a pretty jar at the end. What they often don't teach is why one batch feels silky and another turns thin, waxy, or separated a day later. If you want to learn how to make body lotion that behaves more like a well-built cosmetic formula and less like a temporary kitchen experiment, technique matters.
The good news is that the jump from simple DIY to sound formulation practice is smaller than it looks. Once you understand phases, temperature control, and cooldown timing, lotion making becomes much more predictable. If you like developing your own skincare from scratch, you'll also find useful inspiration in this collection of DIY skincare making articles.
Table of Contents
- Your Journey to a Perfect Homemade Lotion
- Gathering Your Lotion Making Tools and Ingredients
- The Core Process for Creating a Stable Emulsion
- Three Tested Recipes for Every Occasion
- Customizing Your Formula for Perfect Results
- Ensuring Safety Shelf Life and Proper Storage
Your Journey to a Perfect Homemade Lotion
A well-made lotion feels simple when you use it. It spreads quickly, absorbs cleanly, and leaves a soft finish without that heavy, draggy afterfeel that some homemade products have. Getting there takes more than combining oil and water. It takes understanding what each part of the formula is doing.
What makes lotion different
The biggest shift is this. Lotion is an emulsion. You're persuading water and oil to stay together in a stable system, then supporting that system with proper structure, mixing, and preservation. That's why a lotion can feel light and elegant in a way a balm or body butter usually doesn't.
Beginners often assume the secret is a fancy oil or an expensive butter. In practice, texture is driven more by balance than by novelty. A smart choice of emulsifier, the right amount of structure, and disciplined temperature control will improve the final feel more than swapping one boutique oil for another.
Practical rule: When a lotion feels professional, it usually means the formulator respected the process, not just the ingredient list.
What works and what usually fails
What works is a methodical workflow. Weigh ingredients carefully. Keep water and oil phases separate until they've both reached the right condition. Blend long enough to create a uniform emulsion, then keep an eye on the batch as it cools.
What doesn't work is improvising too early. Beginners get into trouble when they replace too many ingredients at once, skip the preservative, or pour everything together before the phases are properly heated. That's when you see graininess, separation, thinning, or a lotion that looks fine at first and fails later.
A lot of confidence comes from knowing that a first batch doesn't need to be complicated. Plain formulas teach more than overloaded ones do. If you can make a simple, stable lotion with a pleasant skin feel, you've already learned the core skill behind more advanced formulations.
The mindset that helps most
Treat your first lotion like a controlled test batch. Keep notes. Write down what you used, how it looked during blending, when it thickened, and how it felt after a day or two. That habit turns “I hope this works” into “I know what changed.”
That's also the fundamental satisfaction in learning how to make body lotion. You stop relying on random recipes and start understanding cause and effect. Once that clicks, customizing becomes much easier and much safer.
Gathering Your Lotion Making Tools and Ingredients
A first lotion batch usually goes wrong before the water is even heated. The scale is missing. Containers are pulled from the cupboard at the last minute. An ingredient gets swapped on instinct. Good setup prevents those errors and gives you a formula you can repeat, adjust, and trust.

Professional results at home do not require lab-scale equipment. They do require control. That means clean tools, ingredients weighed in grams, and a written formula with every phase listed before you start.
What you need on the workbench
Start with tools that support accuracy and clean handling.
- Digital scale: Weight-based measuring keeps the emulsion balanced and lets you repeat a successful batch.
- Heat-safe containers: Use separate glass or stainless steel vessels for water and oil phases.
- Thermometer: Temperature affects melting, emulsification, and when you can safely add delicate ingredients.
- Stick blender or small high-shear mixer: This provides the mixing force needed to form a stable emulsion. For very small batches, a milk frother can help with brief mixing, but it is usually not strong enough to replace a blender for the full process.
- Sanitized bottles or jars: Packaging choice affects both use and contamination risk. Pump bottles usually expose the product to less contact than open jars.
- Spatulas, pipettes, and labels: Small tools matter. They reduce mess, limit cross-contamination, and help you track batch date and formula version.
If you are still learning what each raw material does, this guide to cosmetic raw ingredients for makers helps connect ingredient names to their function in a formula.
The four parts of a lotion formula
Beginners make faster progress when they group ingredients by job instead of reading the formula as one long list.
| Part of formula | What it does | Typical examples |
|---|---|---|
| Water phase | Gives hydration and fluidity | Distilled water, hydrosols, glycerin |
| Oil phase | Shapes richness, slip, and skin feel | Carrier oils, butters, esters |
| Emulsifier system | Keeps oil and water combined | Emulsifying wax, cetyl alcohol, stearic acid |
| Cooldown phase | Adds protection and finishing adjustments | Preservative, fragrance, sensitive actives |
This structure matters because each group behaves differently under heat and during cooling. Water-based ingredients affect viscosity and humectancy. Oils and butters change glide, richness, and afterfeel. The emulsifier system determines whether the lotion stays uniform over time or slowly separates on the shelf.
A beginner-friendly formula usually has a large water phase, a modest oil phase, an emulsifier system sized to support that oil load, and a cooldown phase kept simple. Exact percentages depend on the emulsifier, the oils chosen, and the texture you want, but the principle stays the same. Build a balanced base first. Customize after you know that base is stable.
A lotion that looks smooth right after mixing can still fail later. Stability comes from the full system, not the appearance in the bowl.
One ingredient beginners often ask about is Sodium Hyaluronate Powder Pure Hyaluronic Acid. It is a cosmetic-grade powder used in water-based products such as serums, creams, and lotions. In formulation terms, it belongs with the water-phase side of your planning rather than the oil phase. Check the supplier documentation for handling and compatibility before adding it to a first batch, especially if you are still learning how your base formula behaves.
The ingredient many DIY recipes underplay
Preservative is often treated like a footnote in beginner lotion content. That is a serious gap. Any formula that contains water needs a preservative system suited to the product and used according to supplier guidance. Lotion is not body butter with water stirred in. Once water is present, microbial control becomes part of the formula design.
That is one of the clearest differences between casual DIY and sound cosmetic practice. A simple lotion can still be made to a good standard if you use distilled water, work cleanly, choose ingredients that fit together, and preserve the batch properly. Guidance from the U.S. Food and Drug Administration on cosmetics and product safety is a useful reminder that safety starts long before the product reaches the jar.
This part of the process is not glamorous, but it is what makes customization worth doing. Once your tools, phases, and preservation plan are in place, you can start changing oils, humectants, and skin feel with much better odds of success.
The Core Process for Creating a Stable Emulsion
A lotion can look perfect in the beaker, then split in the bottle the next day. The difference is usually process control, not luck. Once beginners start treating lotion as an emulsion system with temperature, shear, and cooldown requirements, their success rate improves fast.

Build the formula in phases
Work in separate phases from the start. Put distilled water, glycerin, and other water-phase ingredients in one heat-safe vessel. Put oils, butters, fatty alcohols, emulsifier, and other oil-phase materials in another. Keep the preservative, fragrance, and heat-sensitive additives out of the heated phase unless the supplier documentation says otherwise.
Heat both containers separately until the oil phase is fully melted and the two phases are in a similar temperature range. Many formulators aim for roughly 160 to 170°F, or 70 to 75°C, before combining. The exact target depends on your emulsifier and structuring ingredients, but the principle stays the same. If one phase is much cooler, or if waxy materials are only partly melted, the emulsion may form badly and fail later.
This is one of the clearest places where casual DIY habits start to break down. Stirring cool oil into warm water can produce something that looks like lotion for a few minutes. A stable batch needs both phases prepared with intention.
Emulsify, cool, and finish properly
Once both phases are ready, pour them together and blend until the mixture is completely uniform. An immersion blender gives most beginners the right balance of shear and control for small home batches. Milk frothers can work for very small test sizes, but they often leave larger droplets behind, which can shorten stability and change the final feel.
Do not judge thickness too early.
Freshly emulsified lotion is often thinner than the finished product. As the batch cools, emulsifiers and fatty thickeners begin building structure, and the viscosity rises. If you add extra wax or butter too soon because the lotion seems thin, you can easily turn a balanced formula into a draggy, heavy one.
Use this working sequence:
- Sanitize the setup: Start with clean, disinfected tools, containers, and work surfaces.
- Heat the phases separately: Keep water-phase and oil-phase ingredients in their own vessels.
- Match temperatures before combining: Aim for a similar heat range so the emulsion forms evenly.
- Blend until fully homogeneous: No visible oil streaks, pooling, or grainy pockets should remain.
- Stir during cooldown: Gentle mixing as the lotion cools helps the structure set evenly.
- Add cool-down ingredients at the right point: Preservatives, fragrance, and sensitive actives usually go in after the batch has cooled to their recommended addition range.
If you want a closer look at droplet formation and why oil and water need help staying mixed, this guide on how to emulsify oil and water in skincare gives useful background without losing the practical point.
Separation usually points to a handling problem such as poor temperature matching, weak mixing, or adding cool-down ingredients before the emulsion has started to form properly.
One more habit helps. Leave the batch alone enough to observe it. Stirring on schedule is useful. Constantly reblending, scraping, and adjusting in the first hour makes it harder to tell whether the formula is setting normally or starting to fail. That kind of restraint feels minor, but it is part of learning to make lotion to a professional standard rather than just hoping a recipe holds together.
Three Tested Recipes for Every Occasion
You don't need a huge formula library to learn well. You need a few clear starting points that teach the relationship between water, oil phase richness, and final skin feel.

A side by side starting point
| Recipe style | Best for | Water phase | Oil phase feel | Extra note |
|---|---|---|---|---|
| Lightweight daily hydrator | Full-body daily use | Higher end of the usual lotion range | Light oils, minimal butter | Fast, clean skin feel |
| Rich and nourishing body cream | Dry-feeling areas like elbows and feet | Slightly lower within a normal lotion framework | More butter and structure | Thicker and more cushioned |
| Youthful appearance formula | Plump, smooth, hydrated look | Standard lotion base | Balanced oils with humectant focus | Best when you want slip plus bounce |
The lightweight daily hydrator should be your first batch if you want to understand how to make body lotion that absorbs well. Keep the oil phase simple and don't overload the formula with butter. This style teaches discipline because every greasy or waxy choice becomes obvious on the skin.
The rich and nourishing body cream is better for rougher-feeling body zones. You can use more butter here, but stay balanced. Too much hard butter in a lotion can create drag instead of richness, and too much wax can make the product feel dull rather than plush.
The youthful appearance formula works best when hydration is the design goal. In this context, a water-compatible ingredient such as sodium hyaluronate can make sense if you already understand your base formula and preserve it correctly. The goal isn't to stuff the lotion with actives. The goal is to support a smoother, fuller-looking finish.
How to choose the right first recipe
Pick based on what you like using.
- Choose light if you want a pump bottle by the sink or a daily all-over lotion.
- Choose rich if you tend to prefer creams over lotions and don't mind a slower dry-down.
- Choose appearance-focused if your priority is a hydrated, supple finish and you're comfortable handling a slightly more ingredient-aware formula.
If scented hand and body textures are part of what inspired you to start formulating, browsing examples like this lavender hand cream content can help you think in terms of user experience, not just raw ingredients.
A good first recipe should be boring on paper and satisfying in use. That's a compliment. Reliable formulas rarely look dramatic in the notebook.
Customizing Your Formula for Perfect Results
A lotion can look perfect in the beaker and still disappoint after a week of use. It may feel too greasy in summer, too thin in a pump bottle, or slightly irritating once fragrance and actives are added. Customization solves those real-world problems, but the best changes are controlled, documented, and small enough that you can trace what improved the formula.

Adjust texture without losing balance
Start by deciding what you want to change in use, not just on paper. A lotion that feels too heavy usually needs a lighter oil phase, not a weaker emulsifier system. A lotion that feels too thin may need more fatty alcohol, butter, or a better-structured emulsion, rather than extra wax.
This is the point where DIY starts to overlap with professional formulation practice. Change one variable at a time, make a small test batch, and give it at least 24 to 48 hours before judging the final texture. Freshly made lotion often feels thinner or less cohesive than it will after it settles.
pH also matters during customization because it affects skin feel, ingredient compatibility, and preservative performance. A detailed hydrating body lotion formulation guide recommends an ideal finished pH of 5.0 to 5.5 and notes that many formulators cool the batch to about 30°C (85°F) or below before adding heat-sensitive ingredients. If you decide to add acids, botanicals, or new actives, check the finished pH rather than assuming the formula stayed in range.
A lotion can feel elegant and still be poorly finished. Good texture, the right pH, and preservative compatibility all need to agree.
Add scent and specialty ingredients carefully
Fragrance is usually the fastest way to change how a lotion feels emotionally, but it is also one of the fastest ways to make a formula harsh, irritating, or unbalanced. Keep the scent level modest, follow supplier limits, and remember that a body lotion sits on a large area of skin. Stronger is not better.
Specialty additives should earn their place. If an extract, vitamin, or humectant does not support your goal, leave it out. Beginners often get better results from a simple formula with one purposeful addition than from a crowded formula with five ingredients added for label appeal. If you need help comparing preservation options before expanding your formula, this collection of natural skincare preservative articles is a useful reference.
If you plan to sell small handmade runs later, simplicity helps with repeatability, batch records, and customer questions. Alongside your formula notes, these tips for makers selling crafts online are useful because they address the practical side of presenting handmade products clearly and responsibly.
Ensuring Safety Shelf Life and Proper Storage
Many homemade lotions fail in the least visible way. They don't always split dramatically or smell strange right away. They just aren't protected well enough for a water-based product. That's why preservation is not optional.
Why preservation is not optional
A technically sound workflow starts with sanitation and ends with responsible cooldown handling. One practical body lotion guide recommends sanitizing tools with 70% isopropyl alcohol, heating both phases to 158°F (70°C) and holding for 20 minutes, then blending to form the emulsion. It also places preservatives and fragrance only after the batch falls below 115°F (45°C), as described in this basic body lotion recipe and process guide.
That sequence matters because water-containing products need a preservative system, and many preservatives perform poorly if they're added too hot. Beginners sometimes assume clean tools are enough. They aren't. Sanitation reduces contamination pressure. It doesn't replace preservation.
If you're comparing options, this library of natural skincare preservative articles can help you evaluate which preservative systems fit the kind of lotion you want to make.
Storage habits that support a safer product
Storage won't rescue a poorly preserved lotion, but it does support a well-made one.
Use these habits every time:
- Label the batch: Write the product name, the date made, and the full ingredient list for your own records.
- Choose practical packaging: Pumps often reduce repeated finger contact compared with open jars.
- Store thoughtfully: Keep the lotion closed, clean, and away from heat and direct light.
- Watch for changes: If color, texture, or scent shifts noticeably, don't keep using the batch casually.
The most responsible makers aren't the ones with the fanciest formulas. They're the ones who treat a lotion like a real cosmetic product from the first weighing to the final label.
Skin Perfection offers DIY skincare supplies and finished products for makers who want to formulate with more control and better ingredient visibility. If you're refining how to make body lotion at home, it's a practical place to source materials while keeping your process focused on stability, safety, and skin feel.