
 Buy with Prime


At its heart, making your own face cream is a beautiful dance between oil and water. The whole process is about combining a water phase and an oil phase, then using a little magic—an emulsifier—to bring them together into a stable, creamy lotion. It involves gently heating both parts separately, blending them until that perfect creamy texture appears, and finally, adding in your delicate, heat-sensitive ingredients once everything has cooled down.
Your First Steps into Homemade Skincare
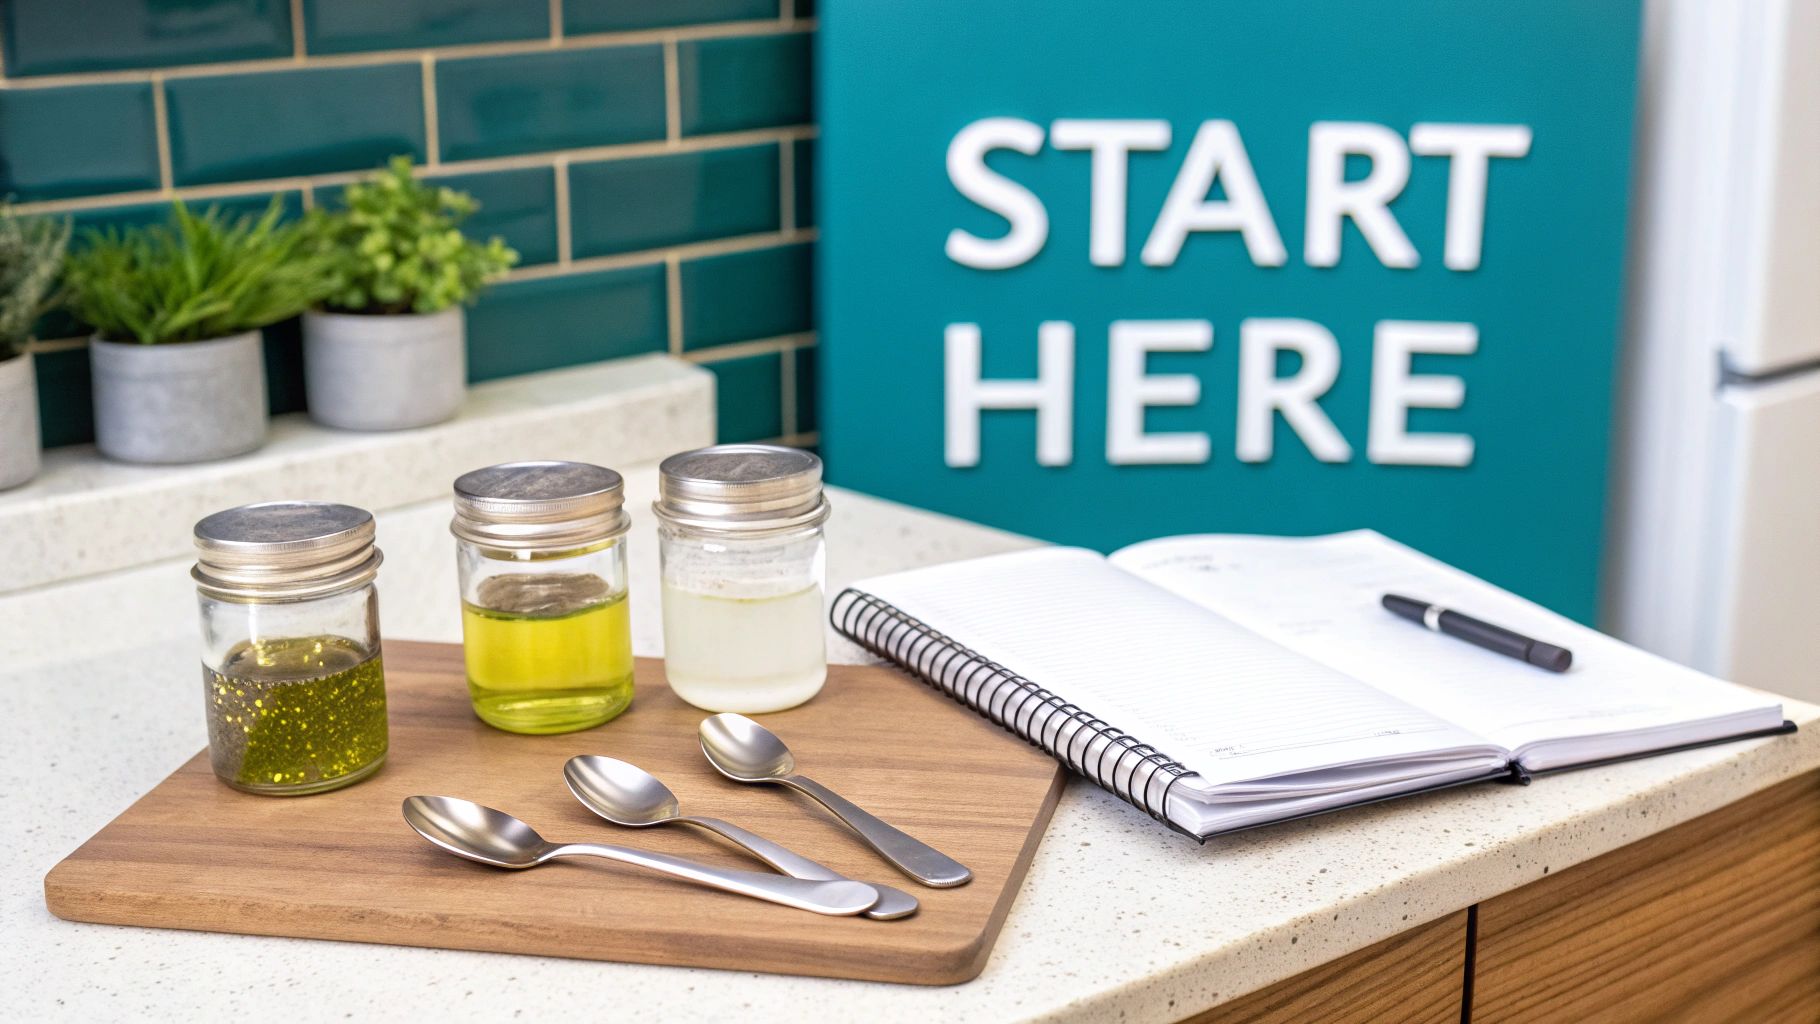
Welcome to the incredibly rewarding world of DIY skincare. There's a special connection that comes from creating your own products—you get to choose every single ingredient that touches your skin. This guide is here to pull back the curtain on how to make a face cream, breaking it down into practical steps and explaining the simple science behind crafting a luxurious product right in your own kitchen.
You're not alone in this interest. The global face cream market was valued at around USD 16.88 billion and is only expected to grow. This massive number shows a huge shift in how we think about beauty, with more and more people wanting personalized solutions. If you're curious about the numbers, you can read the full research about the face cream market for a deeper dive.
Understanding the Core Components
Every single emulsified cream, whether it's a light-as-air lotion or a decadent body butter, is built on three fundamental pillars. Once you really get how they work together, you're well on your way to becoming a confident formulator.
- The Water Phase: Think of this as the hydrating foundation of your cream. It’s usually distilled water, but you can get creative and use things like floral hydrosols—rosewater is a classic for a reason—to add a touch of elegance.
- The Oil Phase: This is where all the moisturizing and skin-conditioning goodness comes from. It's a blend of carrier oils (like jojoba or sweet almond) and butters (like rich shea or mango butter). The oils and butters you choose will completely define the cream's richness and how it feels on your skin.
- The Emulsifier: This is the bridge, the crucial ingredient that makes the whole thing possible. We all know oil and water don't mix. An emulsifier forces them to play nice, binding them together to create that stable, perfectly homogenous cream you're aiming for.
Once you master the relationship between these three parts, you unlock the power to create a product with the exact texture and feel you've always wanted. Honestly, this foundational knowledge is more valuable than any single recipe you'll ever find.
This guide will walk you through a reliable recipe and give you the skills you need to craft a beautiful cream you'll be genuinely proud to use. And for those who get hooked and want to explore further, we have plenty more resources and guides ready for you when you're ready to make your own skin care products.
Choosing Your Core Face Cream Ingredients
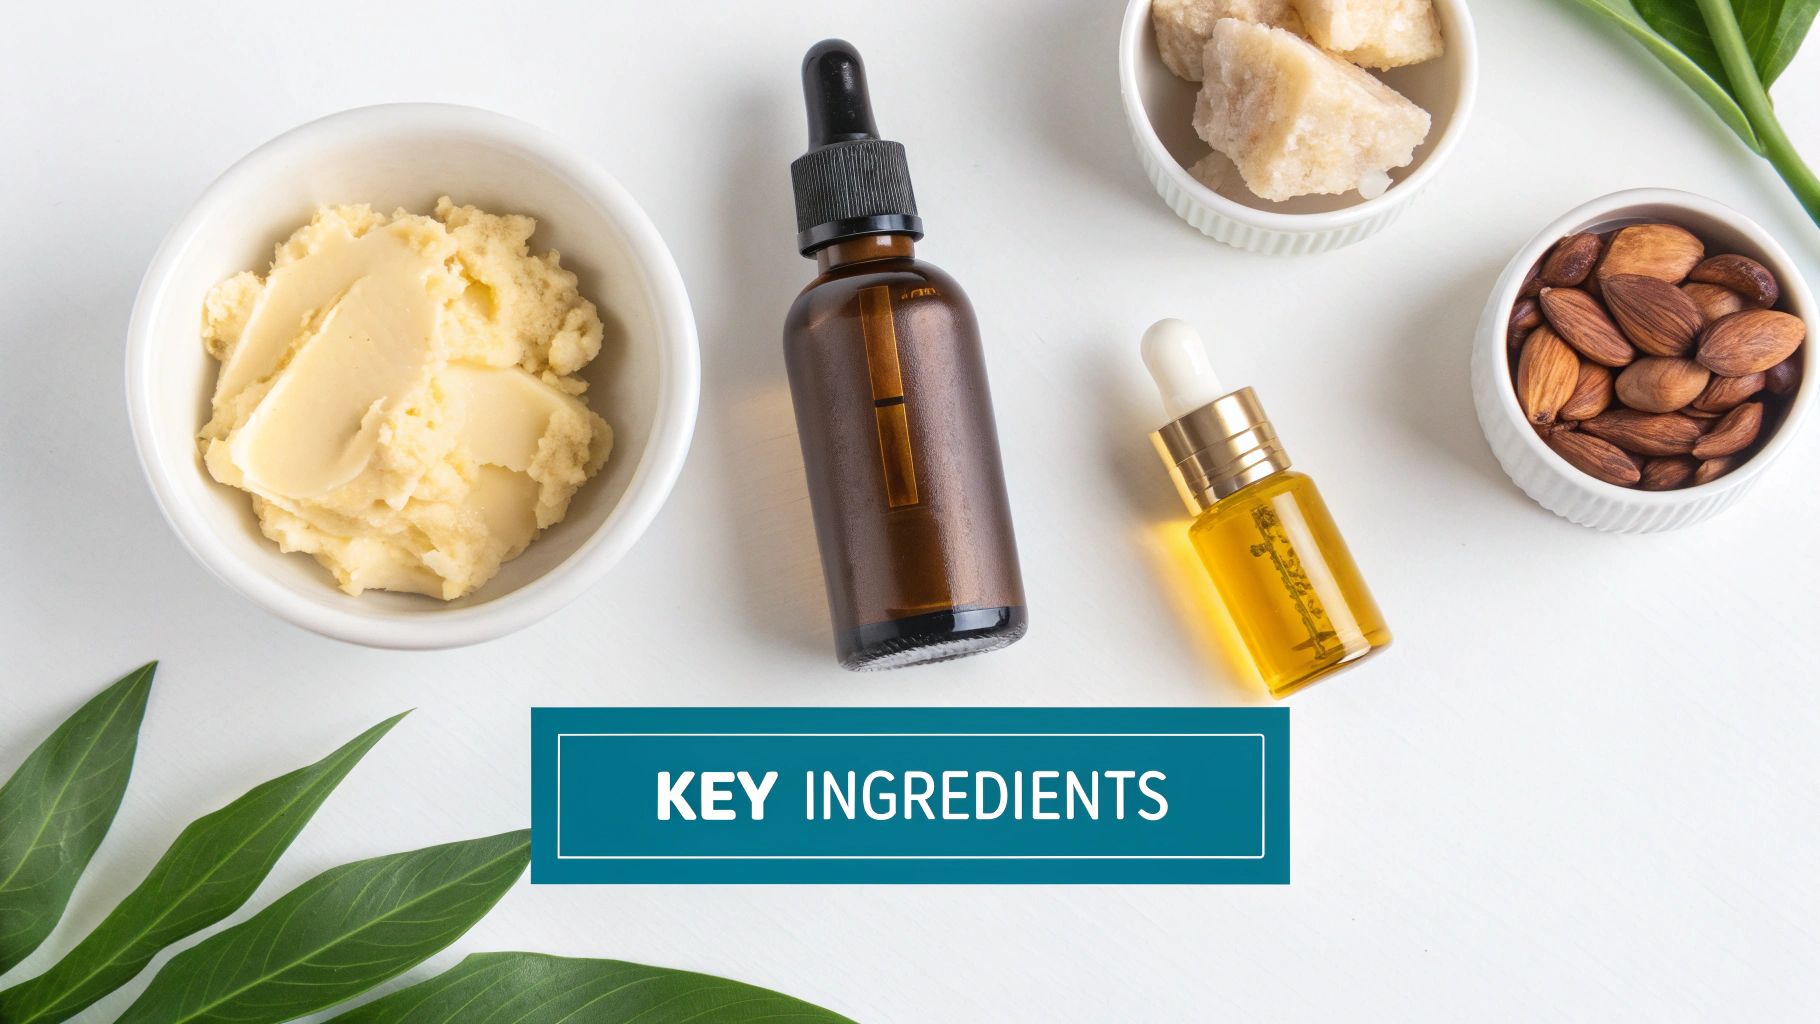
Every truly great face cream begins with choosing the right ingredients. This isn't just about grabbing a recipe and mixing stuff together; it’s about understanding what each component brings to the table. I find it easiest to think about a cream in three distinct parts: the water phase, the oil phase, and the cool-down phase.
Once you get a feel for these three phases, you're well on your way to formulating like a pro. The real magic of cream-making is just the artful combination of oil and water, held together by an emulsifier.
Most classic cream formulas I've worked with hover around 70-80% water phase ingredients and 20-30% oil phase ingredients. A tiny fraction is left for the emulsifiers and other goodies that give it that smooth, luxurious finish you want. You can even explore professional face cream market insights to see how these fundamentals scale up.
The Water Phase: Your Hydrating Foundation
This is the largest part of your cream, and it’s what gives it that fresh, hydrating feel. You can absolutely use plain distilled water—it’s pure and won't introduce any pesky minerals that could mess with your formula.
But here’s a pro tip: this is your first chance to add a little something special. Swapping out the water for a floral hydrosol, like rosewater or lavender water, instantly elevates your creation. It adds a subtle, natural scent. Simple, but it makes a huge difference.
The Oil Phase: For Richness And Feel
Next up is the oil phase. This is where you decide the cream's richness, how it glides on the skin, and its overall texture. This phase is usually a dance between liquid carrier oils and solid butters.
-
Carrier Oils: These are the workhorses. Jojoba oil is a personal favorite because it's so similar to our skin's own sebum. Sweet almond oil is another fantastic choice, known for being incredibly gentle and moisturizing.
-
Butters: This is where you add decadence. Ingredients like shea butter or mango butter give your cream body and that thick, luxurious feel. A cream heavy on butters will feel completely different from one made with just light, liquid oils.
But the real MVP of this phase is the emulsifier. Since we all know oil and water don't mix, the emulsifier is the critical bridge that locks them together. Without it, you’d just have a separated, oily mess.
To help you get started, here’s a quick rundown of some common ingredient choices and what they do.
Essential Ingredient Choices for Your DIY Cream
| Ingredient Category | Common Options | Contribution to the Cream |
|---|---|---|
| Water Phase | Distilled Water, Rose Hydrosol, Lavender Water, Chamomile Water | Provides the primary hydration and acts as the solvent for water-soluble ingredients. |
| Oil Phase - Butters | Shea Butter, Mango Butter, Cocoa Butter | Adds thickness, richness, and contributes to the overall feel of the product on the skin. |
| Oil Phase - Carrier Oils | Jojoba Oil, Sweet Almond Oil, Grapeseed Oil, Avocado Oil | Delivers nutrients, moisturizes, and determines the cream's feel and absorption rate. |
| Oil Phase - Emulsifiers | Emulsifying Wax NF, Olivem 1000, Behentrimonium Methosulfate (BTMS) | Binds the water and oil phases together to create a stable, creamy emulsion. |
| Cool-Down - Preservatives | Geogard ECT, Leucidal Liquid, Optiphen Plus | Prevents the growth of mold, yeast, and bacteria in your water-based product. This is essential. |
| Cool-Down - Additives | Vitamin E Oil, Essential Oils (e.g., Lavender, Frankincense), Glycerin | Adds fragrance, extra humectant properties, or other targeted effects. |
Think of this table as your cheat sheet. As you get more experienced, you'll start mixing and matching these to create a cream that's perfectly suited for your skin.
The Cool-Down Phase: Add The Delicate Stuff Last
Once your heated oil and water phases are beautifully emulsified, you have to let the mixture cool. This final stage is what we call the "cool-down phase," and it's when you add your most heat-sensitive ingredients. If you add them when the cream is still hot, you risk diminishing their properties.
This is the make-or-break step for safety and shelf life. Never, ever skip the preservative. It's a non-negotiable for any product that contains water.
This is the moment to add two vital components:
- A Broad-Spectrum Preservative: I can't stress this enough. Any formula with water is a playground for bacteria and mold. A good preservative ensures your cream stays safe to use for more than a few days.
- Optional Goodies: Now for the fun part! You can add cosmetic-grade essential oils for scent or other active ingredients. This is where you really get to customize and put your personal stamp on the final product.
Understanding these three distinct phases—water, oil, and cool-down—is the key to unlocking your creativity. It takes you from being a recipe-follower to a true formulator, giving you the confidence to start tweaking and designing your very own signature creams.
Gathering Your Essential Tools and Equipment
Before you even think about mixing up your first batch of cream, you’ll want to get your workspace set up properly. You don't need a professional lab to make a beautiful face cream, but having the right tools makes the entire process smoother, safer, and way more likely to succeed. Think of it like baking a cake—the right pans and mixer make all the difference.
Getting your gear ready isn't just for convenience; it’s about precision and safety. The success of your emulsion often hinges on accurate measurements and sparkling clean, dedicated tools.
Your Core Cream-Making Kit
Let's talk about the absolute must-haves. These are the non-negotiables you'll need to create a stable, beautifully blended cream. You might even have a few of these hanging around your kitchen already.
-
A Precise Digital Scale: This is, without a doubt, your most important tool. Skincare formulation is a science, and that means measuring ingredients by weight, not volume (no cups or spoons!). Look for a scale that measures down to 0.01 grams. This is critical for getting tiny amounts of potent ingredients like preservatives and actives just right.
-
Two Heat-Resistant Beakers or Containers: You need one for your water-based ingredients (the "water phase") and another for your oils (the "oil phase"). Glass beakers are ideal because they can withstand the heat of a water bath and let you see exactly what's happening inside.
-
A Small Immersion Blender (Stick Blender): This is the secret weapon for a flawless emulsion. You could try whisking by hand, but an immersion blender's high-speed action is infinitely better at breaking down oil and water particles to form that stable, creamy texture we're aiming for.
Tools for Heating and Monitoring
To create an emulsion, you need to gently heat both your oil and water phases to roughly the same temperature, usually around 75°C (167°F). This step ensures the emulsifier melts completely and allows the two phases to combine without a fight.
To pull this off safely, you’ll need:
- A Small Saucepan: This will act as your water bath (or a makeshift double boiler). You'll just place your beakers inside the saucepan with an inch or two of simmering water, which provides gentle, even heat.
- A Digital Thermometer: Guessing temperatures is a surefire way to end up with a separated, oily mess. A simple digital kitchen thermometer lets you monitor both phases accurately, so you know the exact moment they’re ready to be combined.
The goal is to get both the oil and water phases to the same temperature before you even think about mixing them. This single step is one of the most common reasons beginners struggle with separated creams. A temperature mismatch can completely destabilize your emulsion before it even has a chance.
Sanitation and Finishing Touches
Cleanliness is everything in DIY skincare. Your cream contains water, which means it can quickly become a playground for bacteria and mold if your equipment isn't properly sanitized. This is a non-negotiable step for safety and for making a product that lasts.
- Isopropyl Alcohol (70%): Keep a spray bottle of 70% isopropyl alcohol handy. Before you begin, give every tool, beaker, container, and work surface a thorough spray-down and let it air dry.
- Spatulas: A few small silicone or stainless steel spatulas are invaluable. You’ll use them constantly—for stirring, scraping every last drop of precious product from your beakers, and transferring your finished cream into its final container.
Once you have these items laid out, you’re not just ready to follow a recipe. You're set up like a pro to create a beautiful, safe product from scratch.
A Beginner-Friendly Emulsified Cream Recipe
Alright, this is where the fun really begins—putting all that knowledge into action. Think of this section as us being in the workshop together, walking through a reliable, beginner-friendly recipe from start to finish. We'll cover everything from the crucial prep stage to heating, emulsifying, and adding those final touches.
Making your own face cream is a beautiful mix of science and art. This recipe is designed to be straightforward and rewarding, yielding a wonderfully light, moisturizing cream that feels incredible on the skin.
Preparing Your Workspace and Ingredients
First things first: let's set the stage for success. Before you even think about measuring an ingredient, you need a clean and organized workspace. This isn't just about being tidy; it's a critical safety measure to ensure your final cream is pure and free of contamination.
Grab your spray bottle of 70% isopropyl alcohol. Give a generous mist to your work surface, digital scale, both heat-resistant beakers, the head of your immersion blender, and any spatulas you plan to use. Let everything air dry completely. Whatever you do, don't wipe them down with a towel—that can just reintroduce lint or unwanted microbes.
Once everything is sanitized, it's time to weigh your ingredients. Using a precise digital scale is non-negotiable here. Accuracy is everything.
- Water Phase Beaker: Carefully measure your distilled water and glycerin.
- Oil Phase Beaker: Weigh out your sweet almond oil, shea butter, and emulsifying wax NF.
There's a practice in the culinary world called 'mise en place,' which means having everything measured and ready to go before you turn on the heat. This is just as vital in skincare formulation. It prevents you from scrambling around and making mistakes once things get going.
The Gentle Heating Process
With your ingredients measured and your workspace prepped, you're ready to apply some heat. You'll want to create a gentle water bath by adding about an inch of water to a small saucepan. This method gives you even, indirect heat, which is perfect for preventing your delicate oils and butters from scorching.
Place both your water and oil phase beakers directly into the saucepan. Set your stove to a low-medium heat. The goal is to slowly bring both phases to the same temperature, right around 165-170°F (74-76°C). At this point, your emulsifying wax will be completely melted, and both phases will be ready to become one.
Keep a close eye on the temperature of both beakers with your digital thermometer. You'll probably notice the oil phase heats up a little faster. You can give the ingredients in each beaker a gentle stir to help everything melt and heat evenly. A little patience here pays off big time with a more stable cream later on.
Jumping into making your own cream is part of a massive trend. The global facial skincare market was valued at an incredible USD 90.76 billion, and face creams make up a huge piece of that pie—about 36.48% of the total. Women are the largest demographic, driving nearly 59% of the revenue in this market. You can discover more insights about the face cream market on globenewswire.com.
Creating the Emulsion
This is it—the moment the magic happens. Once both phases have hit that target temperature and all the solids in your oil phase have melted, it’s time to emulsify. Carefully lift both beakers out of the water bath and set them on your heat-safe work surface.
Pour the hot water phase into the hot oil phase. Grab your immersion blender and immediately insert it, making sure the head is fully submerged before you turn it on. This little trick is a lifesaver for preventing hot liquid from splashing all over you and your kitchen.
Start blending in short, controlled bursts of 5-10 seconds. You’ll see the mixture transform instantly from two separate, translucent liquids into a milky white fluid. After a few pulses, you can switch to a more continuous blend for about a minute.
You’re looking for something called "trace." This is when the cream thickens just enough that you can see the tracks of the blender on the surface. Once it looks like a thin pudding, your emulsion is stable. Stop blending now to avoid whipping too much air into your cream.
The Cool-Down Phase
Your cream is officially emulsified, but it's still way too hot for your final, more delicate ingredients. You can speed up the cooling process by placing the beaker in a shallow bowl of cool water (an "ice bath"), or you can simply let it cool at room temperature.
As it cools, give the cream a gentle stir with a spatula every few minutes. This keeps the texture silky smooth and prevents a skin from forming on top. You need the cream to cool to below 100°F (38°C) before adding anything else. If you add your cool-down ingredients while it's too hot, you risk degrading them and making them less effective.
Once it's cool enough, it's time for the final additions:
- Add your preservative.
- Add your Vitamin E oil.
- Add your optional essential oils.
Stir gently but thoroughly with your spatula after adding each ingredient to make sure they are completely mixed in.
This visual guide shows the core workflow for making face cream at home, highlighting the three most critical actions. 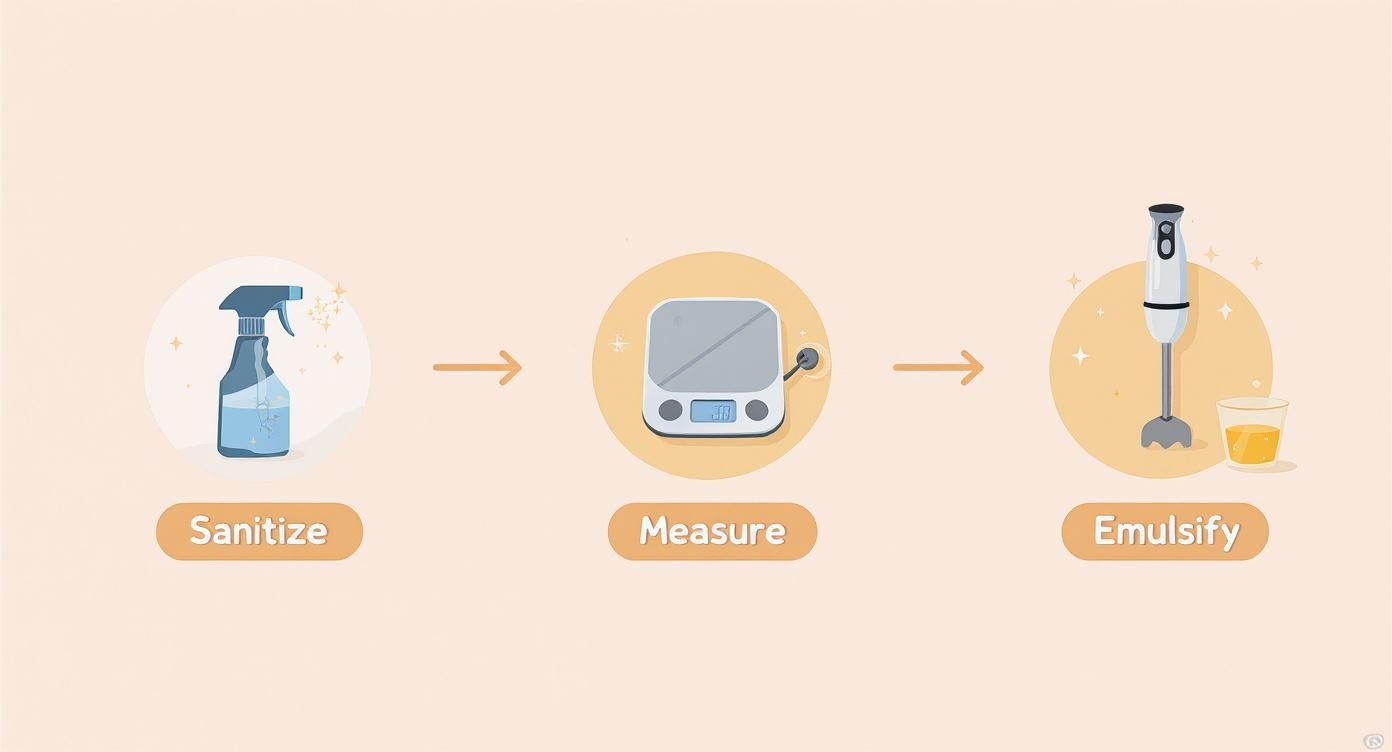 This infographic simplifies the process into three essential actions: sanitizing your tools, precisely measuring your ingredients, and using the right equipment to emulsify.
The last step is to transfer your beautiful, finished cream into a sanitized, airtight jar or pump bottle. Don’t forget to label it with the name and the date you made it. Your cream will continue to thicken over the next 24 hours as it fully sets. And that's it—congratulations, you've just made your own luxurious face cream!
If you find yourself hooked on this creative process, there are countless other formulations to explore. For more ideas, check out our collection of skincare recipes.
Essential Safety and Storage Guidelines
Making a beautiful, creamy emulsion is a wonderfully satisfying moment, but our job as creators doesn’t stop there. In fact, maybe the most important part of learning how to make face cream is understanding how to keep it safe to use. This isn't about getting overly complicated; it's about respecting your ingredients and making something you can feel genuinely good about putting on your skin.
Here's the simple truth: where there's water, there’s the potential for life. That includes the microscopic life we don't want in our skincare—like bacteria, yeast, and mold. Any product that contains water or water-based ingredients, like hydrosols, is a perfect breeding ground for these unwanted microbes.
Without a preservative, a homemade cream can get contaminated in just a few days, even if you stick it in the fridge. This is why a broad-spectrum preservative is absolutely essential. It's not optional. It’s the single most critical ingredient for the safety and stability of your creation.
Good Manufacturing Practices at Home
You don't need a sterile laboratory to make safe products, but you do need to adopt some basic clean habits, often called Good Manufacturing Practices (GMP). It all starts with sanitation.
Before you even think about measuring ingredients, your entire workspace and every piece of equipment need to be thoroughly sanitized. I’m talking about your beakers, spatulas, scale, immersion blender, and especially the final jar your cream will call home. Your new best friend for this is a spray bottle filled with 70% isopropyl alcohol.
Just spray everything down and let it air dry completely. Don't skip this. This simple, non-negotiable step massively reduces the risk of introducing contaminants into your cream from the very start.
Understanding and Using Preservatives
The word "preservative" can sound a little intimidating, but for the home crafter, modern preservatives are incredibly effective and surprisingly easy to use. They’re designed to be used at very low percentages—usually around 1% of your total formula—to keep your products safe from nasty stuff.
When you're shopping for a preservative, look for one labeled "broad-spectrum." This just means it's effective against all three types of microbes: bacteria, yeast, and mold.
Here are a few key pointers for working with them:
- Always follow the usage rates. The supplier will provide a recommended percentage. Using too little won't work, and using too much is just a waste. Precision really matters here.
- Add it during the cool-down phase. Most preservatives are heat-sensitive. You'll want to add them when your cream has cooled to below 100°F (38°C) to make sure they stay effective.
- Choose wisely. There are many options out there. If you're just starting, finding a reliable, easy-to-use one is a great first step. To make it easier, you can explore our hand-picked selection of cosmetic preservatives that are perfect for your homemade creations.
Think of a preservative as the seatbelt for your skincare formula. You hope you never need it to do its job against something nasty, but you would never, ever formulate without it. It’s the ultimate commitment to safety.
Proper Storage for Longevity
Once your cream is finished and safely preserved, how you store it makes a huge difference in its shelf life and integrity. Your beautiful creation deserves a little care.
The ideal storage conditions are simple: a cool, dark place. Direct sunlight and heat can break down the delicate oils and other ingredients in your cream, messing with its texture and effectiveness over time. A bathroom cabinet or a bedroom drawer is perfect.
Also, think about your container. An airtight jar is good, but an airless pump bottle is even better. It helps minimize the cream's exposure to air and potential contaminants from your fingers. If you are using a jar, always use clean fingers or a little cosmetic spatula to scoop out the cream.
With proper preservation and storage, your homemade face cream should have a shelf life of about 3 to 6 months. And one last tip: always label your products with the date you made them so you can keep track.
Common Questions About Making Face Cream
When you first start making your own skincare, a million questions will probably run through your head. That's totally normal! It’s all part of the fun and the learning curve. Let's tackle some of the most common questions we get from new formulators to help you get past those initial hurdles and start creating with confidence.
Getting a handle on the why behind common hiccups is just as important as knowing the fix. A little bit of know-how here can save you a lot of frustration later on.
Why Did My Face Cream Separate After a Few Days?
It's a sinking feeling, isn't it? You make this beautiful, silky cream, and a few days later, it's a separated, oily-watery mess. It’s disappointing, but trust me, it’s a super common problem for beginners. This almost always comes down to an issue with your emulsion.
An emulsion is a delicate dance between oil and water, and if any part of the process is off, the whole thing can fall apart.
Here are the usual suspects when your cream breaks:
- Wrong Emulsifier Amount: This is the number one culprit. Not using enough emulsifier means there isn't enough of it to hold the oil and water together. Always, always use a precise digital scale and stick to your recipe’s percentages exactly.
- Temperature Troubles: If your oil phase and water phase are at wildly different temperatures when you combine them, the emulsion might not form properly in the first place. You want them to be within a few degrees of each other for the best shot at success.
- Not Enough Blending: You need to give your mixture a good blitz with an immersion blender. Under-blending means the oil and water droplets don't get broken down small enough to create that stable, creamy network. Blend in short bursts until you see the magic happen—when it thickens and turns a lovely opaque white.
Do I Really Need to Use a Preservative?
Yes. An absolute, unequivocal yes. Any product you make that contains water (or water-based ingredients like aloe vera juice or hydrosols) is a five-star resort for bacteria, mold, and yeast. Without a broad-spectrum preservative, your gorgeous cream could be a fuzzy science experiment in just a few days, making it totally unsafe for your skin.
Think of it this way: a preservative is a non-negotiable safety feature, not an optional extra. It’s the single most important ingredient for ensuring your product stays safe for its entire shelf life.
And no, popping it in the fridge isn't enough. The cold only slows down microbial growth; it doesn't stop it. A proper cosmetic preservative is the only way to guarantee your homemade face cream is safe to use for more than a few days.
Can I Substitute Different Oils and Butters?
Of course! This is where you get to play and really make a recipe your own. It's the best part of DIY skincare. But, to avoid a texture disaster, you’ll want to make smart swaps.
When you're ready to get creative, try swapping like for like.
- Liquid Oil for Liquid Oil: It’s easy to switch out sweet almond oil for another light liquid oil like grapeseed or apricot kernel oil without much drama.
- Hard Butter for Hard Butter: You could substitute shea butter with mango butter to get a similarly rich, thick consistency in your final cream.
Just be aware that swapping a liquid oil for a hard butter (or the other way around) will completely change the final feel and thickness of your cream. My advice? If you're just starting, make a recipe exactly as written a few times. Once you get a feel for the process, then you can start making small, one-ingredient tweaks to see what happens.
How Long Will My Homemade Face Cream Last?
As long as you've used a broad-spectrum preservative correctly and you're storing it properly, your cream should have a shelf life of about 3 to 6 months. The final lifespan really depends on the specific preservative you chose and how fresh your oils and butters were to begin with.
To get the most out of your creation, always store it in a sanitized, airtight container. Keep it out of direct sunlight and away from heat (so, not on a sunny windowsill!). It's also a great habit to slap a label on everything you make with the date. If you ever notice the color, smell, or texture seems off, play it safe: toss it and whip up a fresh batch.
Ready to get started with top-notch ingredients? At Skin Perfection, we have everything you need to create beautiful skincare at home—from premium oils and butters to the essential preservatives and emulsifiers. Explore our lotion making supplies today!