
 Buy with Prime


Making your own DIY hyaluronic acid serum is one of the easiest and most rewarding projects you can jump into. It's surprisingly simple: you're essentially combining hyaluronic acid powder with distilled water and a good preservative. The result? A fresh, beautiful, and personalized serum for a tiny fraction of what you'd pay at the store.
The Benefits of Crafting Your Own Serum
Ever squinted at an ingredient list on a skincare bottle and felt completely lost? When you start making your own stuff, that confusion just vanishes. Crafting a DIY hyaluronic acid serum is about so much more than saving a few bucks—it’s about knowing exactly what you're putting on your skin and having complete control.
You're the formulator now. That means no mystery fillers, no unwanted fragrances, and no pointless additives. Just pure, high-quality ingredients that you choose.
Ultimate Personalization and Control
This is the number one reason to get into DIY skincare. Your skin isn't a one-size-fits-all situation, so why should your serum be?
Once you have your homemade base, you can start playing around with other powerhouse ingredients to hit your specific appearance goals.
- Targeted Peptides: Add peptides to support the look of firmness and elasticity.
- Botanical Extracts: Mix in soothing extracts like green tea or chamomile for their calming appearance benefits.
- Vitamins: A little Niacinamide (Vitamin B3) can help refine the look of pores and smooth out skin texture.
You just can't get this level of customization from an off-the-shelf product. And if you really want to get technical, you can even explore different types of this key ingredient. Learning about the unique properties of different molecular weights can really change how your final serum feels and performs.
Significant Cost Savings
Let's be honest, high-end serums carry a serious price tag, but the active ingredients themselves are incredibly affordable. When you buy raw materials from a trusted supplier like Skin Perfection, you can whip up a premium-quality serum for way less than you'd spend in a department store.
A tiny bit of hyaluronic acid powder goes a long way. You can make multiple batches from a single purchase, making DIY a smart and economical approach to skincare, not just a hobby.
There's a reason this ingredient is everywhere. The global hyaluronic acid serums market is valued at a whopping US$ 281.6 million in 2024 and is expected to hit US$ 293.4 million in 2025. People want hydration, and HA delivers. It’s a powerful humectant, capable of holding up to 1,000 times its weight in water, making it the perfect foundation for your homemade creations.
Understanding the rise of hyaluronic acid in skincare shows just how versatile it's become, cementing its spot as a must-have in modern beauty. When you start your own DIY journey, you get to tap into this trend with confidence and a whole lot of creativity.
Assembling Your Serum Formulation Toolkit
A truly great DIY hyaluronic acid serum starts with the right setup. Before you dive into mixing, it's a good idea to get everything you need laid out and ready to go. It just makes the whole process smoother, safer, and a lot more fun. This is your all-in-one checklist, covering everything from the specific ingredients you’ll need to the essential tools that guarantee precision.
Your Core Ingredients
Think of these as the foundation of your serum. Every single one has a job to do, and picking high-quality options is what will make you fall in love with your final creation.
The heart of the serum is, of course, hyaluronic acid powder. But here’s something you might not know: not all HA is the same. The biggest difference is its molecular weight, which totally changes how the serum feels and where it delivers its hydrating magic.
- High Molecular Weight (HMW) HA: This type has larger molecules that hang out closer to the skin's surface. They create a moisture-trapping film that gives your skin that instant smooth, plump look and feel. It’s fantastic for surface hydration.
- Low Molecular Weight (LMW) HA: With smaller molecules, LMW HA can offer hydration to more superficial layers of the skin. Serums made with it often feel less thick and sink in a lot faster.
A lot of DIY formulators, myself included, love to blend both. Why choose one when you can have the best of both worlds? For example, a mix of 0.5% HMW and 0.5% LMW creates a beautifully balanced serum with a lovely, silky texture.
Beyond the star of the show, two other things are absolutely non-negotiable for a safe and stable formula. First, you must use distilled or deionized water. Tap water is a no-go; it contains minerals and microorganisms that can mess with your formula and make it go bad quickly.
Second, any formula with water needs a broad-spectrum preservative. This is a critical safety step to stop bacteria, mold, and yeast from growing. Without it, your gorgeous serum could turn into a science experiment you definitely don't want on your face. At Skin Perfection, you can find a variety of reliable cosmetic-grade preservatives that are perfect for water-based serums.
Essential Equipment for Precision and Safety
Having the right tools is just as important as having the right ingredients. Formulating is all about precision, and these items will help you whip up a consistent and effective product every single time.
A digital scale that measures down to at least 0.01 grams is an absolute must-have. You have to weigh your ingredients accurately, especially potent powders and preservatives. It’s crucial for both performance and safety.
You’ll also need clean containers. Using glass beakers or sanitized glass jars for mixing is the best way to prevent contamination and makes it easy to see what you're doing. A mini-mixer or a simple milk frother can also be a lifesaver for blending the hyaluronic acid powder into water without getting annoying clumps.
Finally, pH strips or a pH meter are essential for making sure your final serum is in the skin-friendly range of 4.5 to 5.5.
To make it even easier, here’s a quick-reference list of everything you'll need to get started.
Your Essential DIY Serum Formulation Checklist
| Item Category | Specific Item | Why You Need It |
|---|---|---|
| Ingredients | Hyaluronic Acid Powder (HMW, LMW, or a blend) | The star active ingredient for hydration and plump appearance. |
| Ingredients | Distilled or Deionized Water | The sterile base for your serum, preventing contamination. |
| Ingredients | Broad-Spectrum Preservative | Critical for safety to prevent microbial growth. |
| Equipment | Digital Scale (measuring to 0.01g) | Ensures accurate and safe measurements for all ingredients. |
| Equipment | Glass Beakers or Sanitized Jars | Clean, non-reactive containers for mixing your formula. |
| Equipment | Mini-Mixer or Milk Frother | Helps dissolve HA powder evenly and prevents clumping. |
| Equipment | pH Strips or a pH Meter | To test and ensure the final serum is at a skin-safe pH level. |
| Equipment | Airless Pump Bottle or Dropper Bottle | For storing your finished serum and keeping it fresh. |
Having these items on hand turns what might sound like a complex project into a simple and really rewarding activity.
Creating your own skincare is a smart move that aligns perfectly with emerging trends. DIY hyaluronic acid serums are part of a larger movement towards personalization, which can also trim costs by 50-70% compared to retail prices. As new fermentation technologies make raw materials even more accessible, this trend is set to grow.
Making sure all your cosmetic raw ingredients are ready before you begin makes the entire process more enjoyable. You can explore a wide variety of high-quality DIY skincare supplies, from active powders to specialty extracts, by browsing our collection of cosmetic raw ingredients to get inspired for your next project.
A Practical Guide to Serum Formulation
Alright, you've got your toolkit ready to go. Now for the exciting part—actually making your own DIY hyaluronic acid serum. This is where science meets skincare, and we turn simple ingredients into a silky, super-hydrating final product. We'll walk through it together, using a straightforward 100g recipe as our guide.
Breaking the process into phases—hydration, cool-down, and preservation—is a classic formulator's trick. It guarantees every ingredient goes in at the perfect time and temperature, so nothing loses its punch. Remember, precision is your best friend here, so make sure that digital scale is ready for action.
This visual guide breaks down the core steps, from gathering your ingredients and tools to keeping safety front and center.
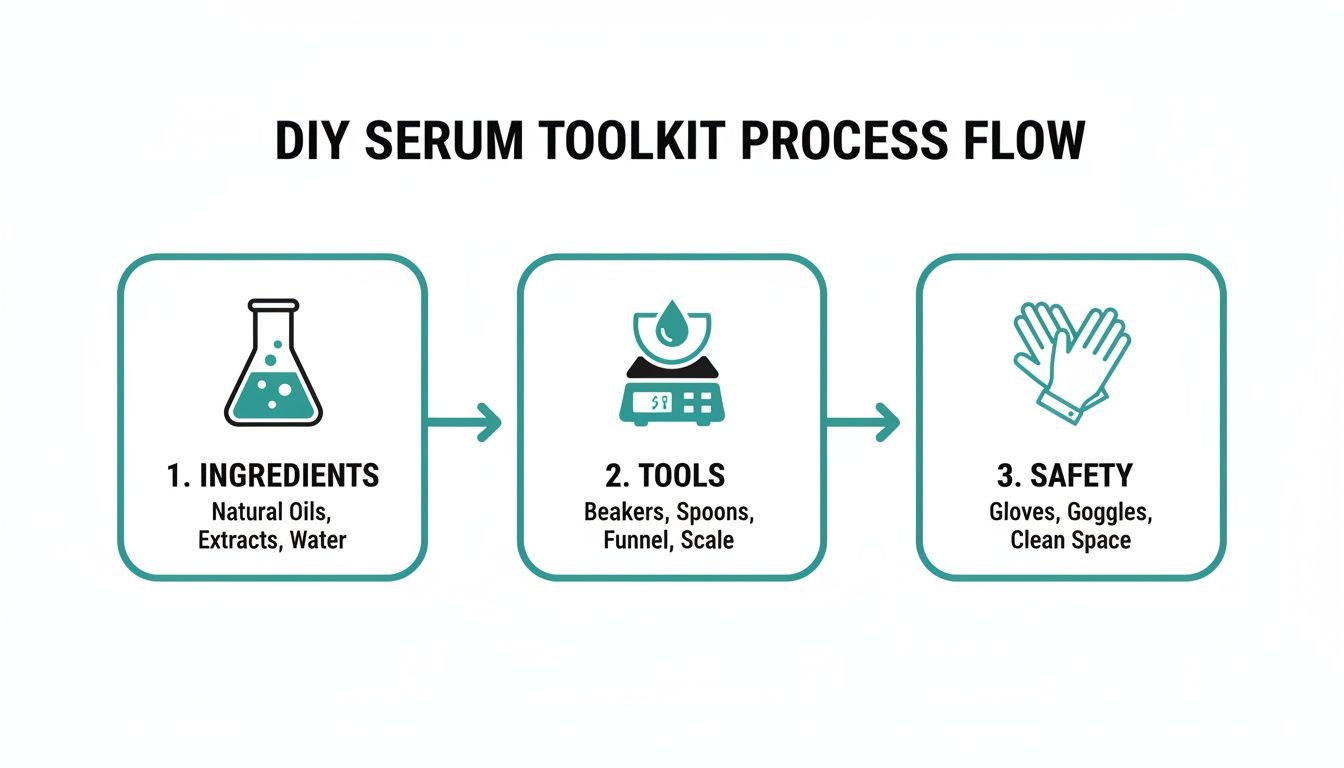
As you can see, a great serum is a blend of quality ingredients, the right tools, and smart safety habits.
The Foundational Hydration Phase
First things first: the hydration phase. This is where we dissolve the hyaluronic acid powder into our distilled water base. Getting this right is non-negotiable if you want a smooth, elegant serum instead of a clumpy mess. It takes a little patience, but trust me, the payoff is huge.
Let's start with a standard 1% hyaluronic acid serum. It's a fantastic concentration that feels great on the skin and delivers serious hydration.
Sample 100g Recipe (1% Concentration)
- 98g Distilled Water
- 1g Hyaluronic Acid Powder (you can use HMW, LMW, or a 0.5g/0.5g blend)
- 1g Broad-Spectrum Preservative (like Leucidal Liquid SF Max, added later)
Go ahead and weigh out 98g of distilled water in a sanitized glass beaker. Next, carefully weigh exactly 1g of your hyaluronic acid powder.
Here's the secret to a clump-free serum: sprinkle the powder over the water's surface very slowly while you're mixing. Your mini-mixer or milk frother is the MVP here. If you just dump the powder in, it will instantly turn into a stubborn, gel-like blob that's nearly impossible to break apart.
Pro Tip: Create a vortex in the water with your mixer before adding the powder. Then, gently tap the hyaluronic acid into the swirling water. This little trick helps it disperse evenly and prevents those dreaded clumps from ever forming.
Once all the powder is in, the mixture will look cloudy and might have tiny specks floating around. That’s normal. Cover your beaker and let it rest for several hours, or even overnight. As the hyaluronic acid fully hydrates, you'll see it transform into a beautiful, clear, gel-like serum.
The Cool-Down Phase for Additives
Once your hyaluronic acid base is perfectly clear and hydrated, it's time for the cool-down phase. This is your chance to get creative and add any other water-soluble goodies, like peptides, botanical extracts, or vitamins like Niacinamide.
It’s called the "cool-down" phase because many of these specialty ingredients are sensitive to heat. By adding them to a room-temperature base, you ensure they stay effective. If you were working with a heated formula, you'd always wait until the mixture cooled below 104°F (40°C) before adding these delicate actives.
For our basic recipe, this phase is super simple. But if you're customizing, now is the time to gently stir in your extras. If you want to get more advanced with your formulas, our resources on cosmetic formulation are a great place to dig deeper.
Preservation and Final pH Adjustments
This final step is arguably the most critical for keeping your DIY hyaluronic acid serum safe and stable. Because our formula is water-based, it's a perfect playground for bacteria, yeast, and mold. Adding a preservative isn't just a suggestion—it's an absolute must to keep your creation safe for your skin.
Weigh out 1g of your broad-spectrum preservative (or check the supplier's recommended usage rate, as it can differ). Add it to the serum and stir gently but thoroughly until it’s fully incorporated.
Now, let's check the pH. Your skin’s natural surface pH is slightly acidic, usually hovering between 4.5 and 5.5. Aiming for a serum in this range makes it gentle and supportive of your skin's natural appearance.
- Testing the pH: Grab a pH strip or a calibrated digital pH meter. Just dip the strip into the serum (or place a drop on it) and compare the color to the chart. Easy.
- Making Adjustments: If the pH is too high (alkaline), a drop or two of a lactic acid or citric acid solution will bring it down. If it's too low (acidic), a touch of sodium bicarbonate solution will raise it. Go slow, adding tiny amounts and re-testing until you hit that sweet spot.
Once your serum is preserved and pH-balanced, it's ready for its new home. Carefully pour it into a sanitized, opaque bottle—an airless pump or dropper bottle is ideal. This type of packaging shields the formula from light and air, keeping it fresh for longer. When made correctly, your beautiful serum should have a shelf life of about 3-6 months.
Customizing Your Serum for Your Skin Goals
Now that you've got the perfect base recipe in your back pocket, the real fun begins. This is where you get to play cosmetic chemist, turning a simple hydrator into a personalized powerhouse that’s perfectly tuned to your skin’s unique needs. By introducing a few key active ingredients, you can elevate your DIY hyaluronic acid serum from a daily staple into a targeted solution.
Think of your hydrated HA gel as a clean canvas. From here, we can layer on ingredients that align with what you want to achieve, whether that's supporting a look of firmness, brightening your complexion, or just giving your skin an extra dose of radiance.
Selecting Peptides for a Youthful Appearance
Peptides are, without a doubt, one of the most exciting additions you can make. These clever little ingredients are short chains of amino acids—the very building blocks of essential proteins like collagen and elastin.
When you add a peptide to your formula, you’re introducing a specialized ingredient that helps support the look of skin elasticity and firmness. For instance, an ingredient like Matrixyl 3000 is a go-to for formulators looking to diminish the appearance of fine lines and promote a smoother-looking complexion.
With peptides, a little goes a long way. Always stick to the supplier's recommended usage rate, which for most peptides is between 1-5%. Just be sure to add them during the cool-down phase of your process to keep them stable and effective.
Incorporating Botanical Extracts and Vitamins
Beyond peptides, a whole world of botanical extracts and vitamins is waiting to be explored. These ingredients can add beautiful properties to your formulation, from soothing appearance benefits to providing antioxidant support.
Here are a few popular options to consider:
- Green Tea Extract: Known for its wonderful soothing properties, this is a fantastic choice for anyone hoping to achieve a calmer-looking complexion.
- Niacinamide (Vitamin B3): This multitasking vitamin is a huge fan favorite for its ability to visibly refine pores and improve the look of uneven skin tone. A typical usage rate is 2-5%.
- Panthenol (Pro-Vitamin B5): This is another superb humectant that works beautifully alongside hyaluronic acid. It helps keep skin looking soft, supple, and hydrated.
These additives let you create a multi-functional DIY hyaluronic acid serum that does so much more than just hydrate. And if you're hunting for more hydration inspiration, check out our guide on natural humectants for skin.
The broader market for hyaluronic acid is projected to skyrocket to USD 16.7 billion by 2030, which shows just how much people value effective hydration. DIY formulators are a huge part of this trend, mixing 1-2% HA concentrations with other actives to get professional-level results at home.
Finding Inspiration from Established Formulas
While our focus is on DIY, it never hurts to look at what the big brands are doing for inspiration. Take a peek at the ingredient lists of iconic products like gold standard vitamin C serums like SkinCeuticals C E Ferulic. Seeing how they combine powerhouse ingredients like Vitamin C, Vitamin E, and Ferulic Acid can spark brilliant ideas for your own antioxidant-rich serums.
The key is to start simple. Introduce one new active ingredient at a time. This lets you see exactly how your skin responds and makes it easy to pinpoint what works best for you. It’s the best way to become a more confident and intuitive formulator.
Choosing the right additives can feel overwhelming, so I've put together a table to help you match ingredients to your specific goals. Before you add anything, though, always double-check the supplier's guidelines for exact usage rates and solubility.
Popular Additives to Enhance Your Custom Serum
| Ingredient | Recommended Usage Rate | Primary Appearance Benefit |
|---|---|---|
| Matrixyl 3000 (Peptide) | 3-8% | Helps to reduce the appearance of fine lines and wrinkles. |
| Niacinamide (Vitamin B3) | 2-5% | Visibly refines pore size and improves uneven skin tone. |
| Panthenol (Pro-Vitamin B5) | 1-5% | Provides additional hydration for a soft, supple look. |
| Green Tea Extract | 1-4% | Offers soothing properties, ideal for a calm complexion. |
| Argireline (Peptide) | 3-10% | Targets the look of expression lines for smoother skin. |
By thoughtfully selecting and adding these ingredients, you can craft a truly bespoke serum that addresses your unique concerns, putting the power of personalized skincare directly into your hands.
How to Keep Your Serum Safe and Store It Properly
When you start creating your own beautiful skincare, making sure it's safe is just as important as picking the right ingredients. Especially when you're whipping up a DIY hyaluronic acid serum, you're dealing with a water-based formula. That means a few key practices are non-negotiable to keep your creation pure, effective, and ready to make your skin look radiant.
Here's the golden rule of DIY skincare: any product that contains water absolutely must have a broad-spectrum preservative. No exceptions. Water is a playground for bacteria, mold, and yeast. Without a preservative, your lovely serum could become a science experiment within days, long before you can see or smell anything funky.
This isn't just about preventing spoilage; it's a serious health and safety step. Putting a contaminated product on your face is not recommended. A good preservative protects all your hard work from microbial growth. If you're not sure where to start, you can learn more about the different natural skin care preservatives available.
Cleanliness Is Key: Sanitizing Your Workspace
Before you even think about measuring out your ingredients, get your workspace and tools squeaky clean. This simple prep work goes a long way in preventing contaminants from sneaking into your serum.
- Wipe Down Your Surfaces: Give your countertop or work area a thorough wipe-down with a disinfectant spray.
- Sanitize Your Gear: Wash all your beakers, spoons, and bottles with hot, soapy water first.
- The Final Sterilization Step: After washing, spray everything down with 70% isopropyl alcohol. Let it all air dry completely. Don't wipe it—the evaporation is what does the sanitizing magic.
Getting this prep right from the start sets you up for a stable and safe final product.
The Importance of a Patch Test
Even when you've used the cleanest ingredients and followed all the rules, it's always a smart move to patch-test any new formula before applying it all over your face. This is your chance to check for any personal sensitivities to the new blend you've just created.
A patch test is your personal safety check. It lets you see how your skin will react to a new product in a small, controlled spot before you go all in.
To do a patch test, just dab a small amount of the serum onto a discreet patch of skin, like the inside of your wrist or just behind your ear. Give it 24-48 hours and keep an eye on the spot. If you don't see any redness, itching, or irritation, you're good to go!
Storing Your Serum for Longevity
Proper storage is the final piece of the puzzle. It protects your hard work from the elements that can break down your formula over time. The main culprits to watch out for are light and air.
For the best results, keep your DIY hyaluronic acid serum in a dark, cool spot away from sunlight. A bathroom cabinet or a drawer works perfectly. Using an opaque, airtight bottle—like an airless pump or a dark glass dropper bottle—is your best bet for protecting it.
When you've used a proper broad-spectrum preservative and stored it correctly, your homemade serum should stay fresh and effective for about 3-6 months. This timeline ensures you’re always using a product that’s both safe and at its peak performance.
Common Questions About Making Your Own Serum
Jumping into the world of DIY skincare is a ton of fun, but let's be real—it's normal to have questions pop up. I've been there! Think of this as your go-to guide for navigating some of the common bumps in the road you might hit when whipping up your first DIY hyaluronic acid serum. Getting these little details right makes all the difference.
"Why is my serum lumpy?"
This is probably the number one frustration I hear about. If you've ever just dumped your hyaluronic acid powder into water and watched it turn into a stubborn, gelatinous blob, you're not alone. What happens is the outside of the powder pile hydrates instantly, creating a waterproof seal around the dry powder trapped inside.
The fix is surprisingly simple, and it's all in your technique. First, get a small vortex going in your distilled water using a mini-mixer. Then, start sprinkling the HA powder very, very slowly across the surface of that swirling water. This gives each tiny particle a chance to get wet and hydrate on its own, which is the secret to a perfectly smooth, crystal-clear gel once it's had time to rest.
Understanding Molecular Weights
Another thing that trips people up is the whole high vs. low molecular weight (HMW vs. LMW) hyaluronic acid thing. It’s not just nerdy science talk; the type you pick has a real impact on how your serum feels and how it hydrates the surface of your skin.
- High Molecular Weight (HMW) HA: These are the big molecules. They hang out closer to the skin's surface. They're amazing at forming a silky, moisture-locking film that gives you that immediate feeling of smoothness and provides fantastic surface hydration.
- Low Molecular Weight (LMW) HA: These are the smaller guys. They provide hydration to the more superficial layers of the skin. Serums made with just LMW HA tend to feel thinner, almost watery, and sink in super fast.
Honestly, many seasoned formulators (myself included) land on using a blend of both. Combining HMW and LMW gives you the best of both worlds: a beautifully textured serum that delivers multi-level surface hydration.
The Non-Negotiable Role of Preservatives
This is the big one. "Can I just skip the preservative?" The answer to this is always, without a doubt, a hard no. Any formula that contains water—and yes, that includes your beautiful DIY hyaluronic acid serum—is the perfect place for nasty bacteria, mold, and yeast to throw a party.
Skipping a preservative isn't being "more natural"—it's being unsafe. Microbial growth can start long before you can see or smell anything funky, turning your lovely serum into something that could be harmful to your skin.
Using a broad-spectrum preservative isn't optional; it's a critical safety step. It's what keeps your serum stable and safe to use for its intended shelf life, which is usually about three to six months. This step protects your hard work, and more importantly, it protects your skin. Nailing these key details means you're not just making a serum; you're creating a safe, effective, high-quality product you can be truly proud of.
Ready to create a personalized serum that meets your unique skin goals? At Skin Perfection, we offer a curated selection of high-quality DIY lotion-making supplies, from various molecular weights of hyaluronic acid to effective peptides and broad-spectrum preservatives. Start your formulation journey with ingredients you can trust by exploring our collection at https://www.naturalorganicskincare.com.