

 Buy with Prime


The advice that gets repeated most often about how to make homemade face moisturizer is that a spoonful of beeswax will marry your water to your oil. Melt shea butter, stir in jojoba, splash in aloe or rose water, whisk until it looks creamy, and you have a face cream. It looks like one for about three days. Then water starts beading at the edge of the jar, the surface turns grainy, or the smell changes and you can't tell whether it's the essential oil or something growing.
Mixing oil and water is the easy part. Keeping them mixed, keeping the water phase hostile to microbes, and keeping the pH where your preservative can work is the job, and most recipes skip straight past it. A cream has three failure points, not one.
The path that keeps a beginner out of trouble runs in a specific order. Start with a base that contains no water at all, learn to control your ratios and your tools, and move to a water-containing cream only when you own a scale that reads to 0.1 g, a pH meter, and a preservative you understand.
The rule that saves batches: when a formula contains no water, the emulsifier problem and the microbe problem both disappear.
Table of Contents
- Three Base Recipes and Their Ratios
- What Each Ingredient Does in Your Moisturizer
- Adjusting the Base for Your Skin Type
- How to Make the Emulsion Step by Step
- Adjusting pH and Keeping Batches Safe
- Fixing Separation, Graininess and Odor
- Make a Small Test Batch and Label It Safely
Three Base Recipes and Their Ratios
Lightness in a face cream is mostly extra water. Extra water is the part that has to stay mixed, stay hostile to microbes, and sit at a pH your preservative can use. Three bases are realistic at home, and they differ mainly in how much water they carry.
An anhydrous balm has no water phase. An oil-in-water cream lets water outweigh the oil. A light lotion pushes the water share higher still. Every point of water you add buys a lighter feel and adds stability work a kitchen batch is worse at than a commercial one.
| Base | Water phase | Oil and wax phase | What you must control |
|---|---|---|---|
| Anhydrous balm | none | 60-70% oils, 10-20% butters, 15-25% beeswax | Clean tools and small batches. No emulsifier and no preservative, because there is no water for either to manage |
| Oil-in-water cream | 60-70% | 20-25% | An emulsifier that can hold the larger oil share, plus a preservative used at the dose on the supplier's technical sheet |
| Light lotion | 70-75% | 10-15% | A thinner oil phase that splits more readily, so both the emulsifier and the preservative have to suit that higher water load, again at the supplier's stated dose |
Why the Balm Is the Beginner Base
A balm is waxes and butters melted with oils, poured while warm, and left to set. It works like a soft wax you can spread, not a standing candle. Nothing needs emulsifying, nothing needs preserving, and nothing needs a pH reading. The slip that ruins a first attempt is texture. Too much wax makes a balm that drags across the face. Stay near the bottom of the 15-25% beeswax range and let shea or another butter build the body instead.
A Worked 100 g Cream Batch
Take the middle base and build it by weight. The water phase takes about 65 g: 60 g distilled water plus 5 g glycerin. The oil and wax phase takes 22 g, split between squalane, shea butter, and a small share of beeswax. The emulsifier takes 4 g and joins the oil phase. The last 9 g stays back for cooled additions: the preservative at the dose on its technical sheet, plus any heat-sensitive active, each inside the supplier's limit.
A preservative such as Leucidal SF Max, a salicylic-free Lactobacillus ferment sold as a broad-spectrum antimicrobial, goes in at the dose stated on the supplier's technical sheet and is blended until well mixed. It can be hazy, so bring it to room temperature before adding it.
Weigh each phase on a scale that reads to 0.1 g. The preservative dose is the smallest number in the recipe. A rough spoonful is how a jar ends up looking finished and still unprotected.
Size the Batch Before You Size the Recipe
Mix 50-100 g for the first attempts. A separated emulsion then costs a few grams of oil instead of a full bottle of squalane, and you can repeat the batch while you learn what "uniform" looks like on your own stove. Make the balm this week. Move to the cream once a scale, a pH meter, and a preservative plan are all on the counter.
What Each Ingredient Does in Your Moisturizer
A jar of cream is a small team of jobs, not a pile of pleasant plants. Assign each ingredient one job and the percentages stop looking arbitrary.
| Role | Examples | Typical share |
|---|---|---|
| Humectant | glycerin, aloe-based water phase | 2-5% |
| Emollient | jojoba, squalane, shea butter | 5-15% |
| Occlusive | beeswax, candelilla wax | 2-8% |
| Emulsifier | supplier-specified emulsifier blend | 3-5% per supplier |
| Preservative | radish root ferment | per the supplier's technical sheet |
Humectants pull water toward the surface and belong in the water phase. Glycerin at 2-5% is the cheapest improvement most home creams can make, because tight skin is often short of water at the surface, not short of oil. Emollients soften that surface and change how a cream spreads. If you're still choosing yours, this explainer on carrier oil basics for spa blends covers how jojoba, squalane and shea each behave. Occlusives slow water leaving the skin, the way a light lid slows a pot from drying out. Preservatives only earn their place once water is in the jar. A water-free balm sidesteps most of that risk. A cream does not.
The Emulsifier Is the One You Can't Improvise
Beeswax can look as if it should hold oil and water together. It mostly does not. According to the history of cold cream compiled at Cosmetics and Skin, a 1913 version used 70 parts rose water, 15 parts beeswax, 15 parts spermaceti, 90 parts almond oil and 0.17 parts rose oil, and its author warned that the high water content made it difficult to compound and prone to separation. Galen, a Roman physician, is credited much earlier with a simple mix of water, beeswax and olive oil. A later cold cream cut the water sharply and still needed borax to help the wax hold the oil.
That history carries a plain lesson. Beeswax gives body and occlusion but is a relatively inefficient emulsifier, so a beeswax-only cream can split in storage no matter how patiently you whisked it. A usable cream comes from balanced phases, matched temperatures and a real emulsifier.
Home batches are riskier than commercial ones on this point. A supplier blend is built for a stated percentage and a stated method, and the common slip is adding extra wax, which makes a greasy split rather than a stable cream. Skin Perfection's DIY supplies include preservatives, formulas and lotion-making ingredients, but the use rate for a radish root ferment still comes from that supplier's technical sheet.
For what goes into a lotion and why each percentage sits where it does, the reference on the ingredients of lotion is the list to read before you buy anything.
Adjusting the Base for Your Skin Type
Skin type should decide your base before it decides your ingredients. Wash with a gentle cleanser, apply nothing, wait 30 minutes, then read your face. Tight, flaky cheeks point to dry. Shine across the forehead and nose points to oily. An oily T-zone with dry cheeks is combination, and stinging or visible redness after a plain wash points to sensitive.
The four base directions below follow that check.
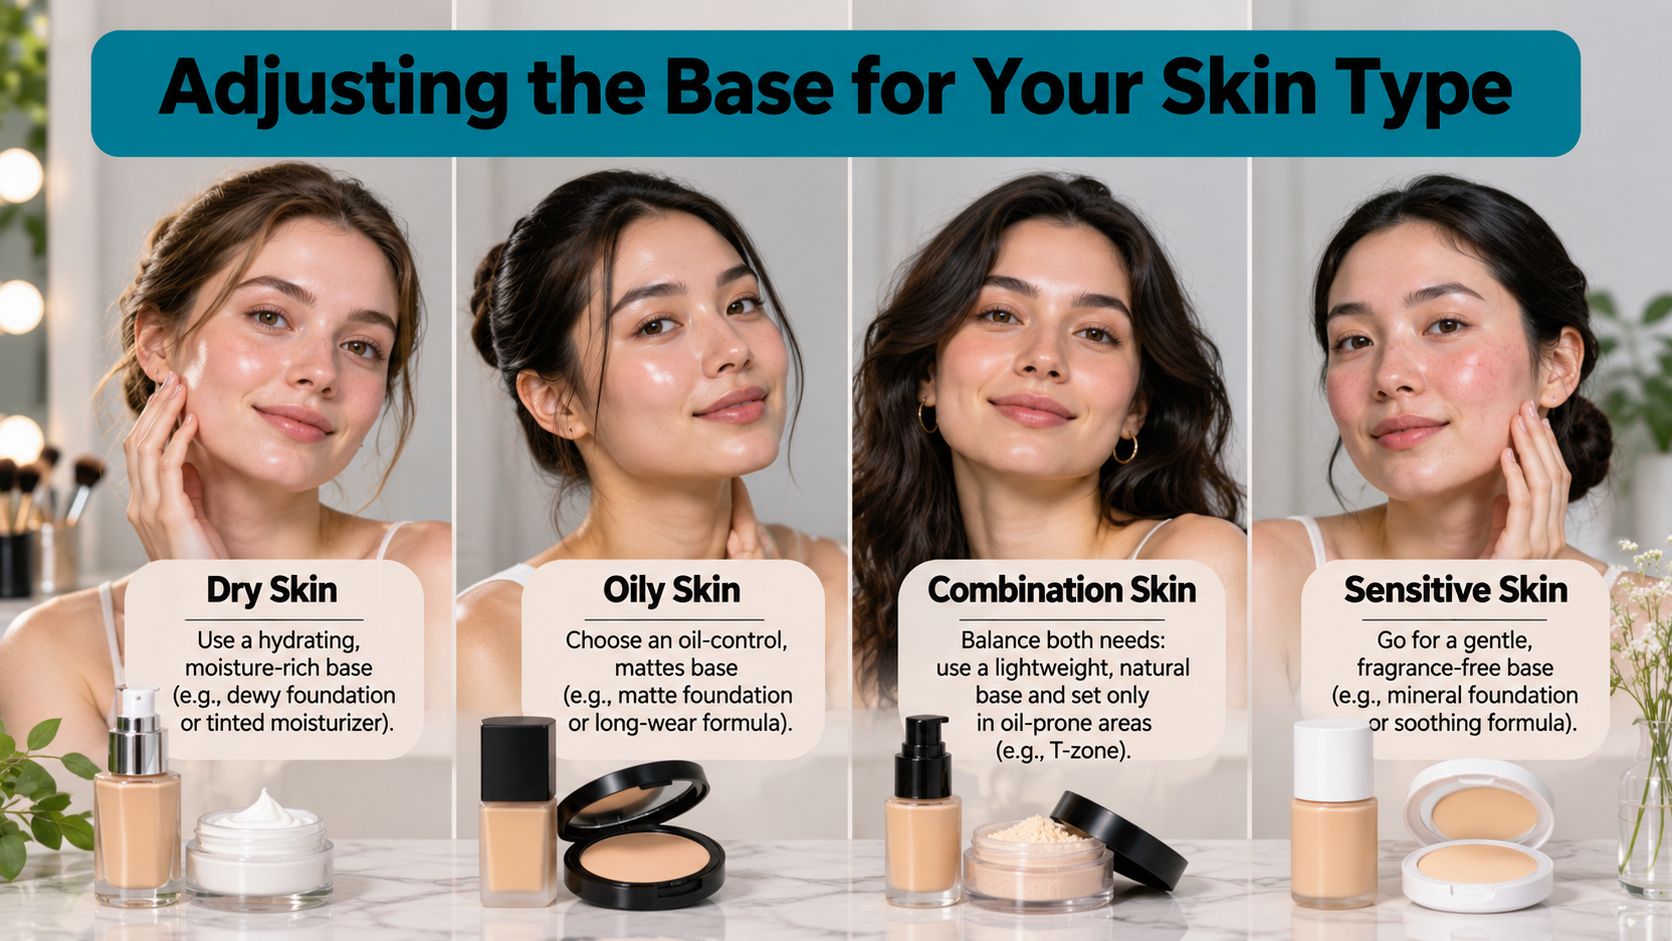
| Skin type | Base to choose | Emphasize | Limit or skip |
|---|---|---|---|
| Dry | oil-in-water cream | shea butter, squalane | heavy fragrance and essential oils |
| Oily | light lotion | glycerin, small share of jojoba | heavy butters and balm bases |
| Combination | light lotion | glycerin and squalane | rich butters on oily zones |
| Sensitive | fragrance-free cream | glycerin and a simple emollient | all essential oils, especially citrus |
| Mature | richer cream | balanced humectant and emollient | any wording that promises age reversal |
Combination skin is where a single batch earns its keep. Make the lotion, apply one thin layer everywhere, then a second layer only on the cheeks. That's the whole adjustment, and it beats making two products.
The Essential Oil Question
A peer-reviewed analysis of online homemade cosmetic recipes found that essential oils commonly recommended in DIY formulations can cause contact allergy, allergic contact dermatitis and photosensitization, as reported in this review of homemade cosmetic recipes. Citrus oils add photoreactivity on top of that. A leave-on facial product keeps those ingredients in contact with skin for hours, which is a different exposure from a rinse-off scrub.
People with eczema, a history of fragrance allergy or a compromised barrier carry more risk than the average user. Plant origin doesn't predict tolerability, so judge a formula by concentration, allergen profile and how long it stays on your skin. Our guide to what are the 5 skin types is a useful second reference if your bare-face check left you between categories.
How to Make the Emulsion Step by Step
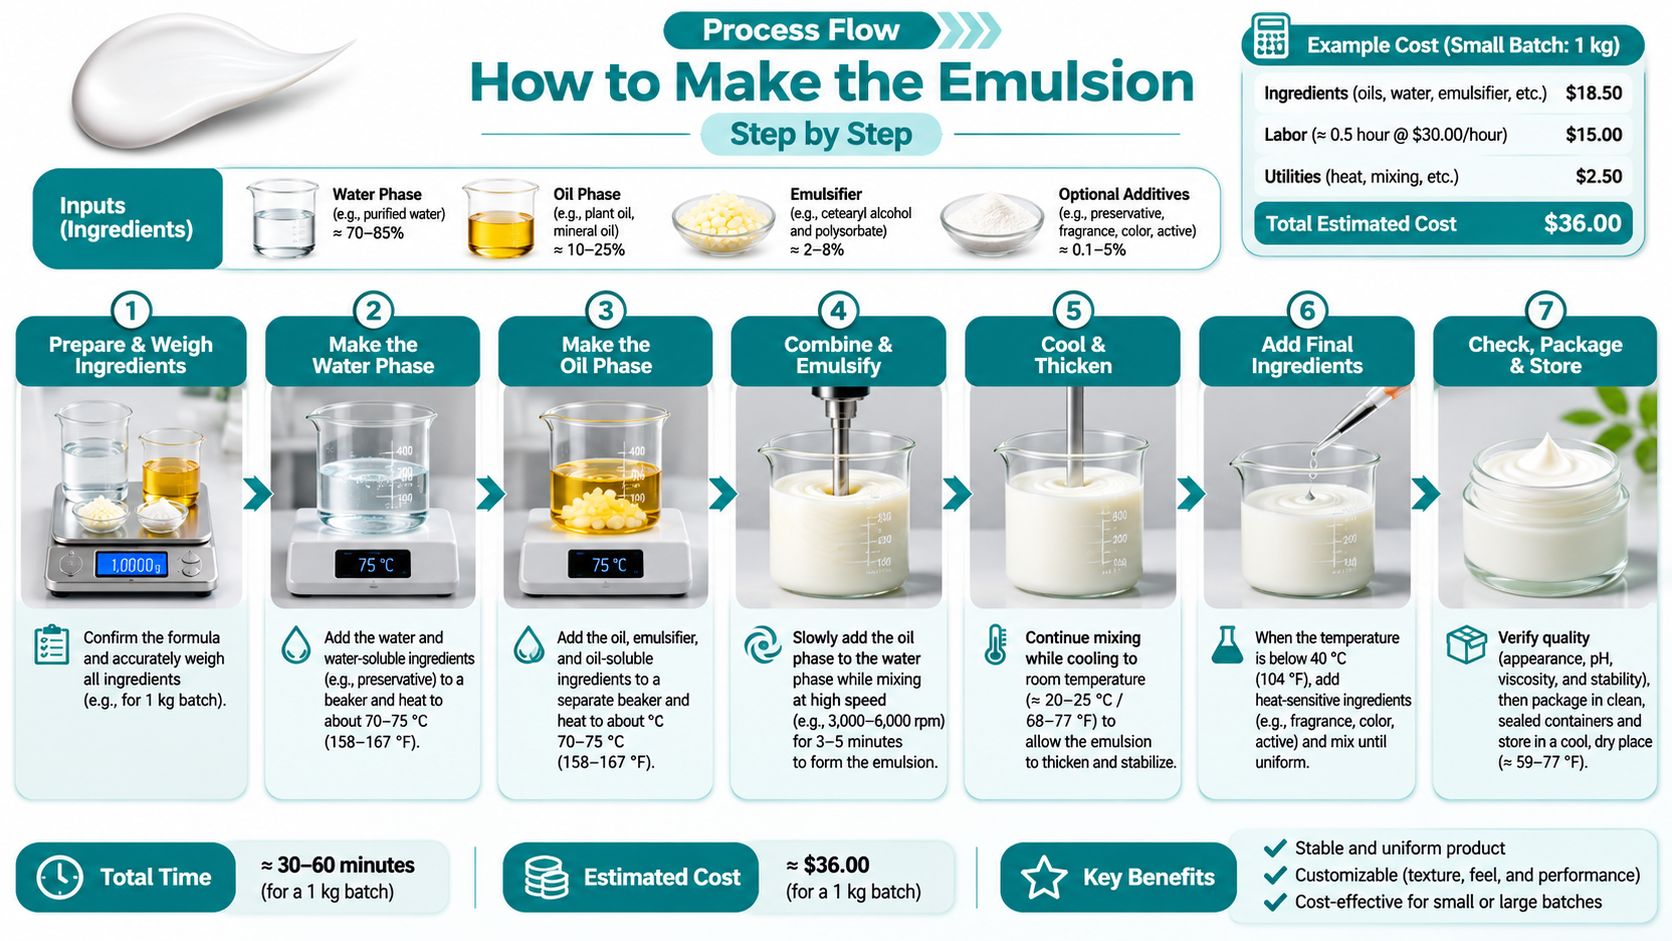
Order matters more than the recipe. Work through these eight steps and the cream usually holds.
- Weigh, don't scoop. A digital scale reading to 0.1 g is the only way to hit a 4 g emulsifier dose or a 2 g preservative dose. Label the water phase, the oil phase and the cool-down cup before you start. Volume measures drift with temperature and packing, which is why cups fail here.
- Sanitize every tool. Wash bowls, spatula and containers in hot soapy water, dry them, then wipe with 70% isopropyl alcohol. The tools behind our fruit mask method get the same treatment for the same reason: a clean spoon is not a sanitized spoon.
- Heat the two phases separately to the temperature your emulsifier supplier specifies, often around 70-75°C. Waxes need to melt fully and both phases need to match, or the emulsifier sets unevenly and the batch never recovers.
- Add the oil phase to the water phase slowly while both are hot, stirring as you pour. Pouring fast drops the temperature in patches and you get a grainy set before the emulsifier has done its work.
- Homogenize with a stick blender for 1-2 minutes, pausing to scrape the sides. Keep the head submerged to avoid whipping in air, which shows up later as foam trapped in the jar.
- Stir gently as it cools. The most common slip in the whole process is cooling too fast, in a cold water bath or the fridge, which leaves waxy grains that never smooth out.
- Check and correct the pH once the cream is cool, then add heat-sensitive actives and finally the preservative below about 40°C. Heat degrades actives and some preservatives, and pH first means the preservative goes into the environment it was chosen for.
- Fill a pump or airless container, not an open jar. Every finger dipped into a jar is an inoculation, and the shoulder of a wide jar collects exactly what you don't want near your eyes.
The flow runs from two heated phases to one filled jar.
If your two phases resist each other, our walkthrough on how to emulsify oil and water covers the temperature and shear points in more detail.
What a Finished Batch Should Look Like
Smooth and glossy, with no water pooling at the edge and no wax flecks when you spread a dab on the back of your hand. It should feel cool rather than tacky, and it shouldn't smell sharper than its ingredients.
Water-based creams need preservation because water, raw materials and poor manufacturing conditions can introduce bacteria or fungi, and the FDA's page on microbiological safety and cosmetics names microbial contamination as a potential health hazard in cosmetics. The same source notes that high-water products such as creams and lotions need preservatives, especially because they're opened repeatedly in warm, humid rooms.
Store the finished cream cool, never top it up with water, and throw it out at the first change in smell, colour, viscosity or separation.
Adjusting pH and Keeping Batches Safe
A warm cream lies about its pH the way a just-boiled soup lies about salt. Heat shifts the reading, so a number taken while the jar is still warm is not the number skin will meet later.
Measure only after the batch is fully cool, with a calibrated meter or narrow-range cosmetic strips, and aim for about pH 4.5-5.5 unless the preservative or an active needs another validated window. Skin surface is mildly acidic, so a cream set lower than that can nudge surface pH down over weeks of use. Treat the target as a band, not a single point.
Correct in a fixed order. Adjust the cooled, unpreserved cream first: diluted citric acid to bring pH down, diluted sodium hydroxide to bring it up. Mix well, let the reading settle, and check again. Never drip concentrated acid or alkali into a face cream. Those drops leave pockets of extreme pH that a later stir may not erase.
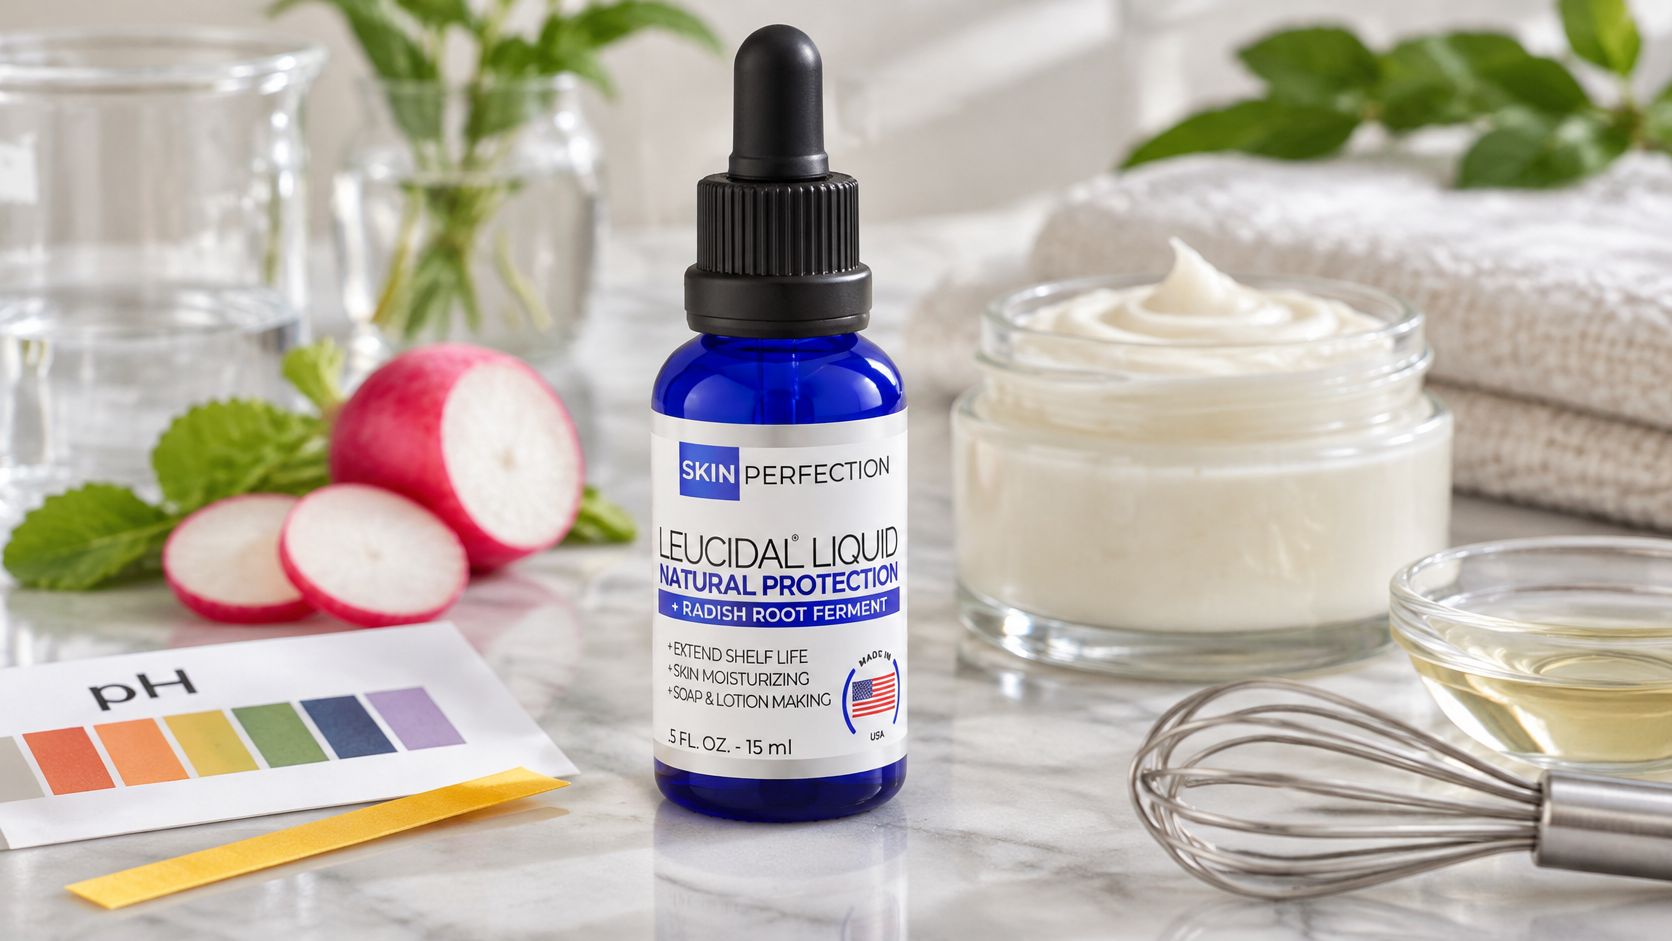
Then add the preservative and recheck, because it only works inside its own pH window. Leucidal Liquid Radish Root is a radish root ferment. Read the use rate on its technical data, and confirm it suits the other ingredients before you scale past a test jar. The natural skin care preservative reference covers how to match a preservative to a formula.
An oil balm skips most of this. No water phase means no emulsion pH to set and far less for microbes to grow in, which is why a balm is the safer beginner batch. A water cream still needs a written discard date, a small jar, and no trust in how normal it looks.
Fixing Separation, Graininess and Odor
Separation is the failure you'll meet first. A ring of water at the bottom of the jar within three days usually means too little emulsifier or a batch that cooled too slowly for the emulsifier to set its structure. Raise the emulsifier within the supplier's range, homogenize longer, and stir while it cools instead of walking away.
| Symptom | Likely cause | Fix |
|---|---|---|
| Separates within a few days | emulsifier too low or cooled too slowly | raise emulsifier within supplier range, homogenize longer, cool with gentle stirring |
| Grainy or waxy texture | waxes set too early | reheat both phases, blend until smooth, cool more slowly |
| Thin and watery | water phase above 75% | cut water by about 5 points and retest |
| Off smell, colour change or mould | contamination or oxidation | discard the batch and check preservative level and container |
| Measured pH drifts | warm storage or unchecked acid addition | retest pH, store cool, use smaller batches |
| Stinging or red patches | essential oil or new active | stop use, patch test, remove the added ingredient |
Why a Reading You Took Last Week Is Already Wrong
pH moves in storage. One cream formulation's pH went from 6.19 on day 0 to 5.06 after 35 days at 40 ± 1 °C, according to this stability data published in PubMed Central. A jar left in a hot car or a steamy bathroom is running its own accelerated test.
Before you blame the recipe: retest pH before you change anything, then store the next batch somewhere genuinely cool.
Which Fixes Need a Fresh Batch
Odour, colour change, mould or any sign of separation after a fortnight means the batch is finished. Don't skim the water off, don't re-emulsify it and don't add more preservative to a contaminated cream. Graininess and a thin texture are the two problems worth solving in a small adjusted sample: reheat, re-blend, change one number, and note what changed.
Make a Small Test Batch and Label It Safely
A batch that looks and smells normal can still be contaminated. For a water-based cream, appearance alone cannot confirm microbial safety, so follow the preservation and pH checks in the earlier sections and consider using a bacterial test kit for skincare batches if you plan to keep making creams.
Record the date, pH reading and texture of your test batch. Patch test on the inner forearm for 24 to 48 hours before applying it to your face. Keep it away from eyes and broken skin, and stop use if burning, swelling or persistent redness occurs.
Label the container clearly. The FDA's guidance on cosmetic labeling claims explains that claims to treat or prevent disease, or affect the body's structure or function, can classify a product as a drug. Describe cosmetic purposes such as cleansing, beautifying or moisturizing. Do not imply that a homemade recipe, ingredient or finished batch has FDA approval, as the cosmetics labeling regulations make clear.
Skin Perfection sells lotion-making supplies, including airless bottles, preservatives, bulk bases and formulas, for people making their own products. Choose a balm if you want a simpler first project: without water, it avoids the emulsion, preservation and pH challenges of a cream. For a cream, use the batch-sizing guidance in section 1, keep careful records, and assess the result before scaling up.